

The Three Critical Phases of Kitchen Countertop Installation
Transforming your kitchen with brand-new surfaces is an exciting milestone. Whether you are updating a classic home in Albuquerque or designing a modern space in Rio Rancho, every successful installation follows a structured path. Rather than rushing straight to cutting slabs, a flawless transformation moves through three distinct, coordinated stages to ensure structural integrity and visual beauty.
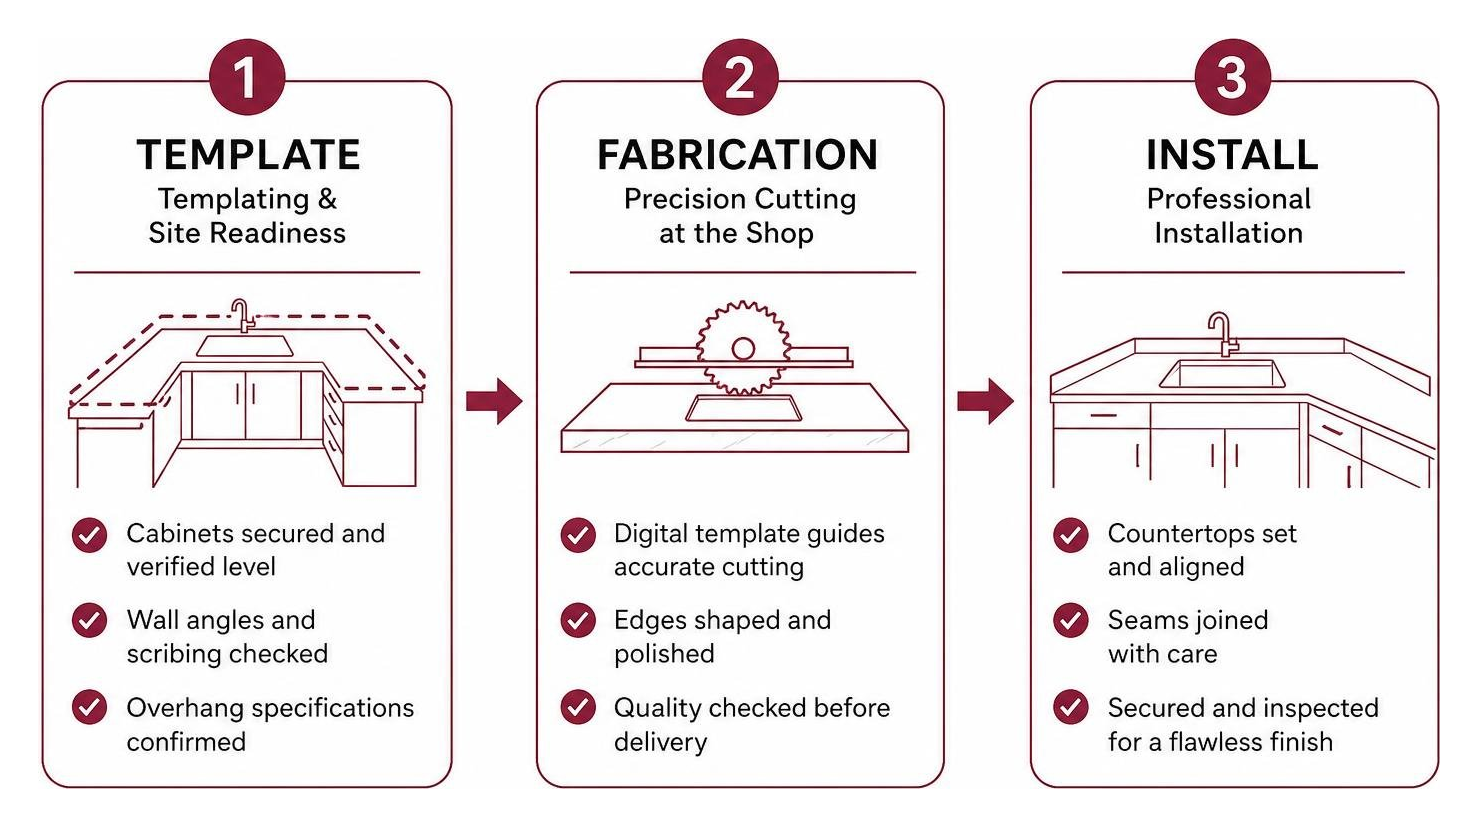
Phase 1: Templating and Site Readiness
Templating is arguably the most critical step in the entire process. A mistake here of even a fraction of an inch can cause expensive delays at the fabrication shop. During this visit, technicians create a precise digital or physical map of your kitchen.
Before the templater arrives, your base cabinets must be permanently secured to the wall and verified flat across all planes. The team checks wall angles, scribing needs, and overhang specifications.
To prevent scheduling delays, keep these items on-site during templating:
- The exact sink model (undermount or drop-in) so cutouts and clip placements can be programmed.
- The faucet, soap dispenser, and any integrated water filter hardware to verify drilling locations.
- The cooktop or slide-in range to ensure exact appliance clearance.
This is also the stage where you finalize your edge treatment. Reviewing our step-by-step guide to kitchen counter edge options helps you match the profile to your lifestyle and design goals.
Phase 2: Stone and Quartz Fabrication
Once digital measurements are taken, the work shifts off-site to the fabrication facility. Here, raw slabs are transformed into custom surfaces using precision bridge saws, waterjets, and CNC profiling machinery.
Fabricators carefully inspect each slab for natural variations, color consistency, and structural stability before making the first cut. When working with engineered quartz, installers adhere to specific handling standards outlined in technical guidelines, such as the Caesarstone Fabrication & Installation Guide, ensuring that proper support spans, cutouts, and corner radius requirements are met.
Transporting and machining these materials requires specialized equipment. A full slab of 3cm stone weighs between 18 and 20 pounds per square foot, with entire slabs weighing anywhere from 400 to over 800 pounds. Fabrication takes several business days to cut cutouts, profile edges, polish surfaces, and prepare seam joints.
Phase 3: Installation Day Minute-by-Minute
On installation day, the crew arrives on-site for a process that typically spans 4 to 8 hours.
Here is what happens throughout the day:
- Site Arrival & Pathway Prep (8:30 AM – 9:30 AM): Installers lay floor protection and clear a direct route from the truck to your kitchen.
- Old Countertop Removal & Substrate Check (9:30 AM – 10:30 AM): If removal is included, old tops are taken off and the cabinet framework is double-checked for level.
- Dry-Fitting the Slabs (10:30 AM – 12:30 PM): Slabs are carried in using heavy-duty vacuum suction cups and test-fitted dry against the walls to check scribing and joint tight spots.
- Setting & Seaming (12:30 PM – 2:30 PM): Slabs are secured using our proven techniques on the easy way to secure countertops to your cabinets. Installers pull joints together using mechanical seam setters and color-matched two-part epoxies.
- Sink Mounting & Edge Sealing (2:30 PM – 4:00 PM): Undermount sinks are mounted with epoxy clips, and perimeters are sealed with 100% silicone.
- Final Inspection & Walkthrough (4:00 PM – 5:00 PM): The crew wipes down surfaces and conducts a walkthrough with you to verify every edge, seam, and reveal.
Comparing Material and Labor Costs for Countertops
Countertop replacement costs vary based on raw material selection, square footage, edge complexity, and fabrication difficulty. Nationwide, installed kitchen projects generally run from $1,200 to $8,000 or more.

Investing in a professional, paid design and remodeling estimate offers great value during this planning stage. Rather than relying on vague ballparks, a comprehensive paid consultation includes layout renderings, structural assessments, and full planning. This upfront step eliminates costly change orders, helps you select the right materials, and ensures your project stays on schedule.
| Material Type | Material Cost / sq. ft. | Professional Labor / sq. ft. | Average Installed Cost (40 sq. ft.) | Primary Advantage |
|---|---|---|---|---|
| Laminate | $10 – $25 | $20 – $35 | $1,200 – $2,400 | Low initial investment |
| Butcher Block | $35 – $75 | $35 – $65 | $2,800 – $5,600 | Warm, natural wood aesthetic |
| Granite | $40 – $100+ | $35 – $85 | $3,000 – $7,400 | Unique natural patterns, high heat resistance |
| Quartz | $50 – $120+ | $35 – $85 | $3,400 – $8,200+ | Non-porous, zero sealing needed |
Granite and Quartz Pricing Breakdown
Granite and engineered quartz represent the gold standard for modern kitchen remodels. Both materials outperform laminate surfaces, offering superior scratch resistance, structural strength, and high long-term property value. While laminate consists of a printed decorative sheet over particleboard, quartz and natural stone provide solid, enduring quality that elevates your home for decades.
Granite slabs provide organic variations that make every kitchen unique. For a detailed breakdown of slab tiers and installation specifics, consult our guide to granite countertop prices from local installers. If you are seeking premium stone aesthetics with streamlined fabrication, you might also consider prefab quartz countertops.
Laminate and Wood Surface Costs
Laminate countertops remain an option for tight budgets, utility rooms, or investment properties. For homeowners looking for affordable surface ideas, explore kitchen countertops on a budget.
Wood countertops bring character and warmth to modern and rustic designs. To understand the sealing and maintenance requirements of hardwood surfaces, review our guide to installing butcher block countertops.
Hidden Fees and Preparation Expenses
When comparing bids, ensure every scope item is accounted for in writing. Common factors that impact your overall investment include:
- Cabinet Leveling: Shimming or leveling out-of-square base units ($75 to $400).
- Substrate & Framing Adjustments: Adding plywood sub-tops for thinner stone profiles ($150 to $600).
- Plumbing/Gas Relocation: Moving supply lines or drains before installation ($200 to $1,200).
- Local Permitting: Required when modifying electrical outlets or major plumbing rough-ins under state building codes. For statutory code guidelines, reference the Official State of New Mexico Website.
Step-by-Step Preparation and Execution Guide
Careful preparation ensures installation day runs smoothly and efficiently.
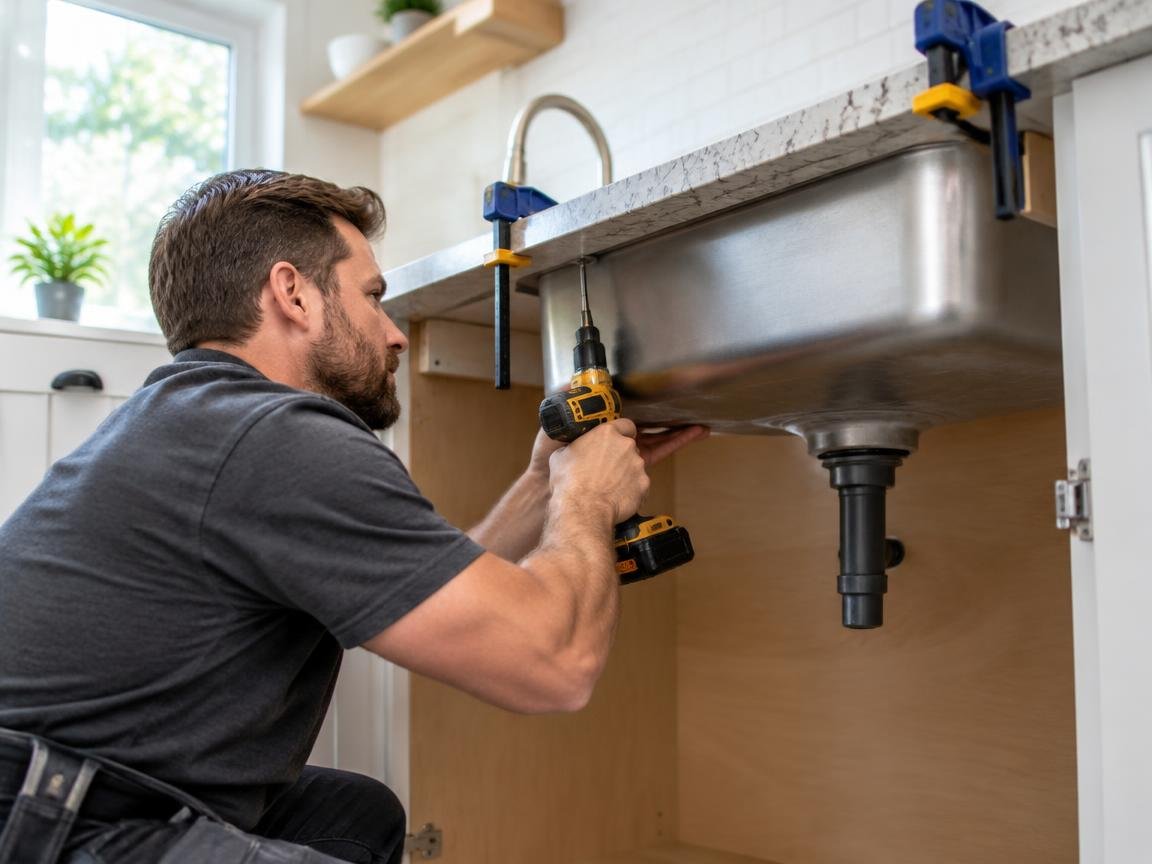
Preparing Cabinets for Kitchen Countertop Installation
Heavy stone surfaces require a level, sturdy foundation. A 10-foot run of 25-inch-deep 3cm granite weighs roughly 375 pounds. Proper cabinet alignment ensures full perimeter contact and balanced weight distribution across the base units.
Using a 4-foot precision spirit level, verify that cabinets are completely flat across all spans. Minor low spots must be leveled using composite shims placed under the cabinet bases. We partner with leading cabinet manufacturers including Durasupreme Cabinetry, Waypoint Living Spaces, Sollid Cabinetry, and Kitchen Cabinet Distributors to provide sturdy, high-grade casework engineered to support heavy stone and quartz surfaces.
Safe Demolition of Old Countertops
If your project includes removing an existing countertop, take these steps to ensure a clean transition:
- Shut off the water stop valves under the sink and disconnect the drain lines.
- Score all silicone and caulk lines along the backsplash using a sharp utility knife to allow a clean release from the drywall.
- Remove all corner mounting screws from underneath the cabinet corner blocks.
- Lift the old countertop upward steadily using wide pry bars, placing wood blocks under the tool to distribute leverage evenly across the cabinet frames.
Sealing, Adhesives, and Post-Install Care
Securing slabs properly ensures long-term performance without locking the materials down too rigidly. Flexible, pure 100% silicone dots are applied along the perimeter of the cabinet rails, allowing slight expansion while firmly anchoring the stone.
For porous natural granite, applying an impregnating, penetrating sealer after installation protects the stone against oil and water-based stains. Once cured, perform a quick water bead test: sprinkle a few drops of water across the surface; if it beads tightly, your seal is complete. To learn more about modern, low-maintenance options, read how to upgrade your kitchen with countertops that actually last.
Deciding Between DIY and Professional Services
Installing light materials like laminate or butcher block can be a practical DIY project for experienced homeowners. However, handling heavy natural stone or quartz requires specialized commercial tools and installation expertise.
DIY vs. Professional Kitchen Countertop Installation Costs
Specialty tools needed for heavy stone installation include:
- Precision rail saws with diamond wet blades ($600 – $2,000)
- Mechanical vacuum seam setters ($300 – $800 each)
- Heavy-duty stone-carrying clamps and safety cups ($200 – $500)
- High-torque variable polishers with diamond pads ($250 – $600)
Renting or buying these tools quickly offsets any DIY savings, and managing oversized slabs requires dedicated crews and equipment. Choosing professional installation provides licensed craftsmanship, manufacturer warranties, and peace of mind. For tips on evaluating local professionals, read our guide on finding the best local countertop companies.
Common Homeowner Mistakes to Avoid
- Skipping the Dry-Fit: Placing adhesive before dry-testing the slabs can cause uneven seams and wall gaps.
- Using Paintable Caulk on Wet Joints: Standard painter’s caulk lacks the flexibility needed in wet zones; always use 100% silicone sealant around sinks and backsplashes to ensure a watertight seal.
- Scheduling Painters Too Early: Countertop installations require maneuvering slabs into place; paint walls after surfaces and backsplashes are fully installed.
- Overlooking Refrigerator Clearances: Ensure new overhangs and edge details do not block refrigerator doors or slide-in appliances from opening smoothly.
Frequently Asked Questions About Countertop Installation
How long after installation before I can use my new countertops?
Epoxy seams require 12 hours to reach full structural cure, while the 100% silicone caulking along the sink rim and perimeter needs 24 hours to dry completely. Avoid setting heavy appliances or resting weight on the joints during this 24-hour cure window.
Do I need a building permit to replace kitchen countertops?
A like-for-like countertop replacement does not require a building permit. However, if your project involves relocating plumbing lines, moving electrical outlets, or reconfiguring island layout walls, local building codes in Bernalillo County and surrounding areas may require standard trade permits.
Who is responsible for reconnecting the plumbing and gas lines?
Countertop installers focus strictly on setting stone, leveling seams, and mounting the sink basin. Reconnecting water supplies, garbage disposals, and gas cooktops should be completed by a licensed plumber or certified contractor roughly 24 hours after installation to allow adhesives to cure.
Conclusion
A well-executed kitchen remodel enhances everyday functionality and brings lasting value to your home. By understanding the three installation phases, budgeting for itemized line items, and partnering with experienced professionals, you can ensure a seamless, stress-free renovation.
At Trussell’s Transformations, we bring more than 25 years of licensed remodeling experience to homeowners throughout Albuquerque, Rio Rancho, and Bernalillo County. We invite you to visit our showroom at 8023 Edith Blvd NE, Albuquerque, NM 87113 to explore our premium material selections.
See cabinet collections from Durasupreme Cabinetry, Waypoint Living Spaces, Sollid Cabinetry, and Kitchen Cabinet Distributors, paired with surface options from Caesarstone, Cambria, Silestone, and The Stone Collection. With our complete design services and 0% financing options, building your dream kitchen is easy and affordable.
Explore our professional kitchen countertop installation services today and schedule your design consultation with our local team!
Recent Comments