

Why Your Attic Is Silently Damaging Your Roof Right Now
Roof ridge vent installation is one of the most impactful upgrades you can make to protect your home — and it’s often the most overlooked.
Here’s the quick answer on how it works:
- Remove existing ridge cap shingles along the roof peak
- Cut a ventilation slot along both sides of the ridge board (stopping 6 inches from each end)
- Position the ridge vent centered over the slot and nail it into the sheathing
- Install ridge cap shingles over the vent to seal and protect it
- Verify that soffit intake vents are unobstructed to complete the airflow loop
That’s the core process. But getting it right takes a little more know-how.
Without proper attic ventilation, summer heat builds fast. Attic temperatures can climb above 150°F, quietly cooking your shingles from the inside out and driving up your cooling bills. In Albuquerque’s intense desert heat, that problem is even worse.
A ridge vent solves this with simple physics. Hot air rises and exits through the peak. Cooler air draws in through soffit vents below. No power required.
But a poorly installed ridge vent — wrong slot width, blocked soffits, mixed exhaust types — can actually hurt your roof more than help it.
This guide walks you through everything: the calculations, the tools, the step-by-step process, and when it makes sense to call a licensed contractor instead.
The Science of Roof ridge vent installation and Balanced Airflow
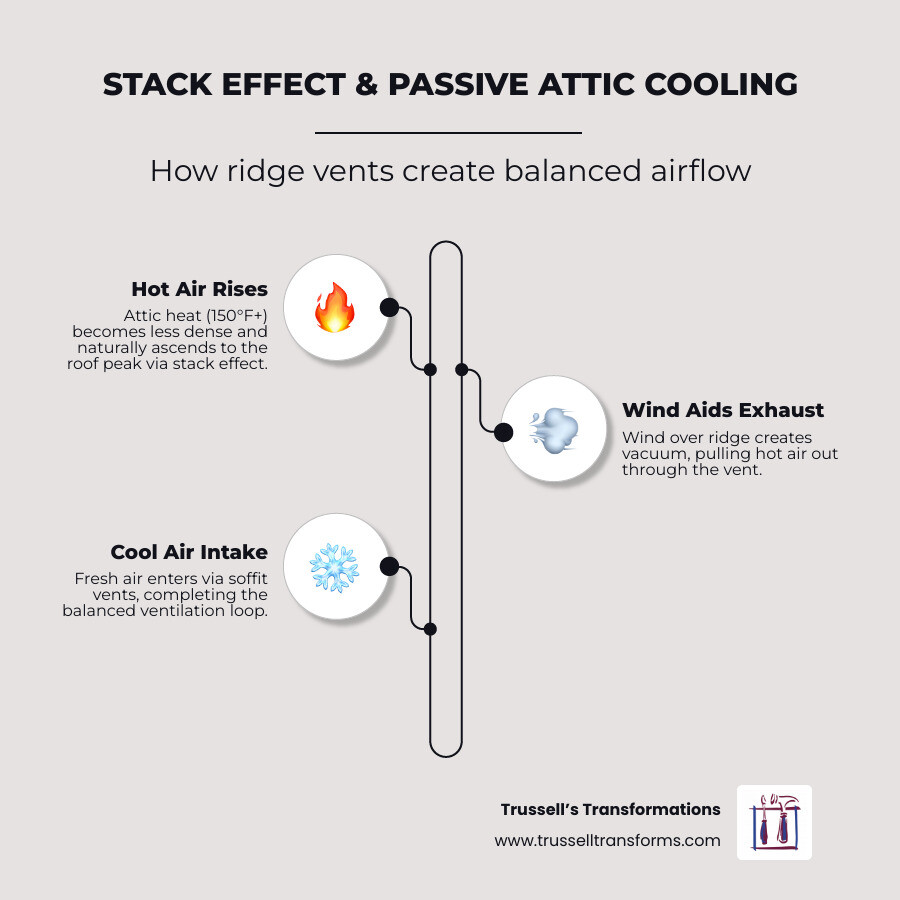
To understand why Roof ridge vent installation is so effective, we have to look at how air moves. In the roofing world, we rely on two primary forces: the stack effect (thermal buoyancy) and the wind effect. The stack effect occurs because hot air is less dense than cold air; it naturally wants to rise to the highest point of your roof. The wind effect happens when wind blowing over the ridge creates a vacuum that literally pulls air out of the attic.
However, a ridge vent cannot work in a vacuum. For air to exit the top, an equal amount of air must enter from the bottom. This is known as a balanced ventilation system.
| Vent Type | Aesthetics | Efficiency | Airflow Consistency |
|---|---|---|---|
| Ridge Vent | Low profile, blends with shingles | High (continuous exhaust) | Excellent (entire ridge length) |
| Gable Vent | Visible on siding | Moderate | Variable (depends on wind direction) |
| Turbine Vent | Highly visible/protruding | High (when spinning) | Variable (requires wind) |
For a healthy attic, we follow the Net Free Ventilating Area (NFVA) standards. NFVA is the total unobstructed area through which air can pass. Most building codes, including those we follow here in Bernalillo County, require 1 square foot of ventilation for every 150 square feet of attic floor space.
If you are Choosing The Best Roofing Material For Your Albuquerque Home, ventilation is the partner that keeps those materials lasting for decades. Without it, even the best shingles will fail prematurely. To get started on the right foot, you can check out this guide on how to Install a Ridge Vent.
Calculating Your Roof ridge vent installation Needs
Before we pick up a saw, we have to do the math. If you have a 1,500-square-foot attic, the 1/150 rule dictates you need 10 square feet of total NFVA. We then split that 50/50 between intake (soffits) and exhaust (ridge).
- Total NFVA needed: 1,440 square inches (10 sq. ft. x 144)
- Exhaust needed: 720 square inches
- Intake needed: 720 square inches
Standard ridge vents typically provide about 18 square inches of NFVA per linear foot. To get your 720 square inches of exhaust, you would need 40 linear feet of ridge vent. If your roof ridge is shorter than the required length, you may need a high-flow vent or additional intake adjustments to optimize airflow.
Understanding Building Codes in 2026
As of April 2026, the International Residential Code (IRC) Section R806 remains the gold standard. While the 1/150 rule is the baseline, there is a 1/300 exception. You can reduce the required ventilation to 1 square foot per 300 square feet of attic space if:
- A Class I or II vapor retarder is installed on the “warm-in-winter” side of the ceiling.
- At least 40% (but not more than 50%) of the ventilation is located in the upper portion of the attic (the ridge).
In our local Albuquerque climate, where humidity is low but solar gain is extreme, we generally recommend sticking closer to the 1/150 ratio to ensure maximum heat rejection.
Essential Tools and Preparation for Your Ventilation Project
Preparation is the difference between a leak-free roof and a weekend nightmare. You’ll need a specific kit to handle the job correctly.

- Circular Saw: Equipped with a carbide-tip blade to handle roof sheathing.
- Chalk Line: For marking perfectly straight cuts along the ridge.
- Roofing Nails: Ensure they are long enough (typically 1 3/4″ to 3″) to penetrate the vent and go at least 3/4″ into the wood decking.
- Polyurethane Sealant: For end caps and overlapping sections.
- Safety Equipment: A high-quality safety harness is non-negotiable.
Safety Tip: Always follow the 4-to-1 ladder ratio. For every 4 feet of height, the base of the ladder should be 1 foot away from the wall. In the windy springs of Rio Rancho, never attempt this work if gusts exceed 20 mph.
Selecting the Right Vent Material
There are two main categories of ridge vents: shingle-over vents and metal ridge vents.
- Shingle-Over Vents: These are usually made of high-density polypropylene. They are popular because they are nearly invisible once the cap shingles are installed. They often feature external baffles, which create low pressure to pull air out while deflecting rain and snow.
- Metal Ridge Vents: Often made of aluminum, these sit on top of the shingles. While durable, they are more visible and generally offer less NFVA than modern shingle-over designs.
For a deeper dive into the technical specs, Fine Homebuilding offers excellent step-by-step ridge vent installation instructions that highlight the importance of material durability.
Step-by-Step Guide to Ridge Venting
If you’re ready to tackle this as a DIY project, follow these steps closely. If at any point you feel uncomfortable with the height or the tools, our team at Trussell’s Transformations is here to help. You can see more of our work in the category/roofing/ section of our site.
Step 1: Remove the Ridge Caps
Using a pry bar, carefully remove the existing ridge cap shingles. Be careful not to damage the “field” shingles (the main shingles on the roof slopes). Remove any protruding nails so you have a flat surface.
Step 2: Mark Your Lines
Snap a chalk line on both sides of the ridge. For a standard ridge board, you typically want to cut 1.5 inches down from the center on each side, creating a 3-inch total gap. Crucial Note: Stop your lines at least 6 inches (or 12 inches for better safety) away from gable end walls and chimneys. Cutting all the way to the edge can compromise structural integrity and lead to water leaks.
Step 3: The Cut
Set your circular saw depth so it only cuts through the plywood sheathing, not the rafters or the ridge board itself. Wear eye protection! Sawdust will be flying. Once cut, remove the strips of wood and clear any debris from the attic space below.
Securing the Vent and Shingle-Over Caps
Now that the slot is open, it’s time to seal the house back up.
- Positioning: Center the first section of the ridge vent over the slot. If you are using a product with “EasyTear” features, you can fit it to length without a saw.
- Sealing the Ends: Apply a generous bead of polyurethane sealant to the foam end caps. This prevents birds, bees, and wind-driven rain from entering the ends of the vent.
- Nailing: Nail the vent every 12 inches through the provided nailing flanges. Do not over-drive the nails; you don’t want to crush the vent’s internal structure.
- Cap Shingles: Lay your ridge cap shingles over the vent. Start from the end of the ridge that faces away from the prevailing winds. This prevents the wind from catching the lip of the shingle and tearing it off. Use nails long enough to penetrate the shingle, the vent, and the roof deck.
- The Final Seal: On the very last shingle, where nails are exposed, apply a dab of roofing cement over the nail heads to prevent leaks.
Professional vs. DIY: Why Licensed Contractors Matter in 2026
While Roof ridge vent installation is a common DIY project, it carries significant risks. In 2026, roofing technology has become more integrated. A mistake in ventilation can void your shingle warranty.
At Trussell’s Transformations, we bring over 25 years of experience to every Albuquerque roof. Here is why homeowners often choose our roofing services:
- Expert Airflow Analysis: We don’t just “cut a hole.” We calculate the exact balance between your intake and exhaust to ensure your attic stays cool.
- Warranty Protection: As licensed contractors, our installations often come with enhanced manufacturer warranties that DIY projects simply can’t access.
- Steep Pitch Safety: If your roof has a 9:12 pitch or higher, the risk of a fall is extreme. We use professional-grade fall protection systems.
- Financing: We offer 0% financing options, making it easier to bundle your ridge vent with a full roof replacement or other home remodels.
Avoiding Common Mistakes in Roof ridge vent installation
We’ve seen it all in the field. Here are the “deadly sins” of roof ventilation:
- Mixing Exhaust Types: Never install a ridge vent if you already have powered fans or turbine vents. This causes “short-circuiting,” where the ridge vent pulls air from the other roof vent instead of the soffits, leaving the rest of the attic stagnant.
- Blocked Soffits: If your attic insulation is shoved into the eaves, your ridge vent is useless. Use rafter baffles to keep the air path clear.
- Inadequate Nail Length: If the nails don’t reach the sheathing, the first New Mexico windstorm will send your ridge vent flying into your neighbor’s yard.
Frequently Asked Questions about Ridge Vents
Do ridge vents leak during heavy New Mexico storms?
When installed correctly with internal baffles and foam end caps, ridge vents are incredibly weather-resistant. The baffles are designed to deflect wind-driven rain upward and over the vent. Most “leaks” attributed to ridge vents are actually caused by improper slot cutting or missing sealant at the end caps.
Can I install a ridge vent on an existing roof?
Absolutely. This is called a retrofit. It is a standard procedure where we remove only the ridge shingles, cut the slot, and install the new system. It typically takes about 4 to 6 hours for an average-sized home in Rio Rancho.
How much does it cost to install a ridge vent in 2026?
On average, homeowners pay between $300 and $650 for a standalone ridge vent installation. If you are doing a full re-roof, adding a ridge vent usually only adds $100 to $300 to the total project cost. Considering that proper ventilation can reduce your cooling costs by up to 20%, the ROI is excellent.
Conclusion
Your roof is more than just shingles; it’s a breathing system. Proper Roof ridge vent installation ensures that your home stays cool, your energy bills stay low, and your roof lasts as long as it was designed to.
At Trussell’s Transformations, we are your one-stop shop for everything home-related in Albuquerque and Bernalillo County. Whether you need a new roof, a kitchen remodel featuring Durasupreme Cabinetry or Waypoint Living Spaces, or stunning new countertops from Caesarstone or Cambria, we have the expertise to get it done right.
Don’t let a frustrated attic ruin your home. From Holiday Roof Care to full-scale transformations, our licensed contractors are ready to help.
Ready to breathe easy? Contact Trussell’s Transformations today for more info about roofing services and schedule your expert consultation.
Recent Comments