

Most walk-in shower remodels land in one of three footprints: 36"×36" for tight spaces, 36"×48" as the everyday sweet spot, and 60"×36" or larger for comfort-first layouts. The IRC requires a minimum interior floor area of 900 square inches (equivalent to 30"×30"), but most remodelers treat that as a legal floor, not a design target. The NKBA Kitchen & Bath Planning Guidelines set 36"×36" as the practical comfort minimum, and that’s the number worth building your plan around.
Here’s how to match your space to the right template:
- Small bathroom or tight alcove: A 36"×36" footprint meets code and works, but it’s snug. Plan carefully around the door swing or go doorless with a fixed glass panel.
- Average remodel (most homeowners): A 36"×48" or 36"×60" gives you room to move, fits a built-in niche, and photographs well for resale.
- Luxury or two-person shower: Start at 48"×60" and go up from there. Anything smaller with two showerheads feels crowded fast.
Key Takeaways
The 36"×48" footprint is the practical sweet spot for most U.S. walk-in shower remodels, satisfying IRC code, NKBA comfort standards, and typical feature needs within a manageable budget.
| Point | Details |
|---|---|
| Legal minimum | IRC P2708.1 requires 900 sq in net interior area (30"×30"); open walk-ins over 70" tall need 36" each direction. |
| Comfort minimum | NKBA and most remodelers treat 36"×36" as the practical floor; 36"×48" is the most common sweet spot. |
| Doorless designs | Plan for 42"–48" depth or add a fixed glass panel; showerhead placement on a side wall reduces splash. |
| Built-ins reduce net area | A bench or niche projection counts against the IRC 900 sq in minimum — measure net area, not gross footprint. |
| Trussell’s Transformations | Handles full shower remodels in Albuquerque, from site measure and permits to tile and glass installation. |
Table of Contents
- What are the standard walk-in shower sizes?
- How do doorless and curbless designs change your sizing needs?
- What do NKBA, IRC, and ADA guidelines say about shower dimensions?
- How big should a two-person or luxury shower be?
- Which fixture and feature clearances are easy to overlook?
- How do you choose the right shower size for your bathroom?
- How does shower size affect cost and installation complexity?
- How Trussell’s Transformations approaches shower sizing on the job
- What we’ve learned from sizing showers on real jobs
- Ready to plan your walk-in shower with Trussell’s Transformations?
- Sources
What are the standard walk-in shower sizes?
Walk-in shower dimensions fall into three practical size classes. Common professional templates include 36"×36", 36"×48", 36"×60", and 42"×60" — each suited to a different bathroom layout and user need.
| Size Class | Footprint | Best For | Features That Fit |
|---|---|---|---|
| Small | 36"×36" | Powder rooms, tight alcoves, secondary baths | Single showerhead, one niche |
| Standard | 36"×48" or 36"×60" | Primary bathrooms, tub-to-shower conversions | Niche, bench on short wall, handheld head |
| Large/Luxury | 42"×60" or 48"×60" | Master suites, two-person use | Dual heads, built-in bench, multiple niches |
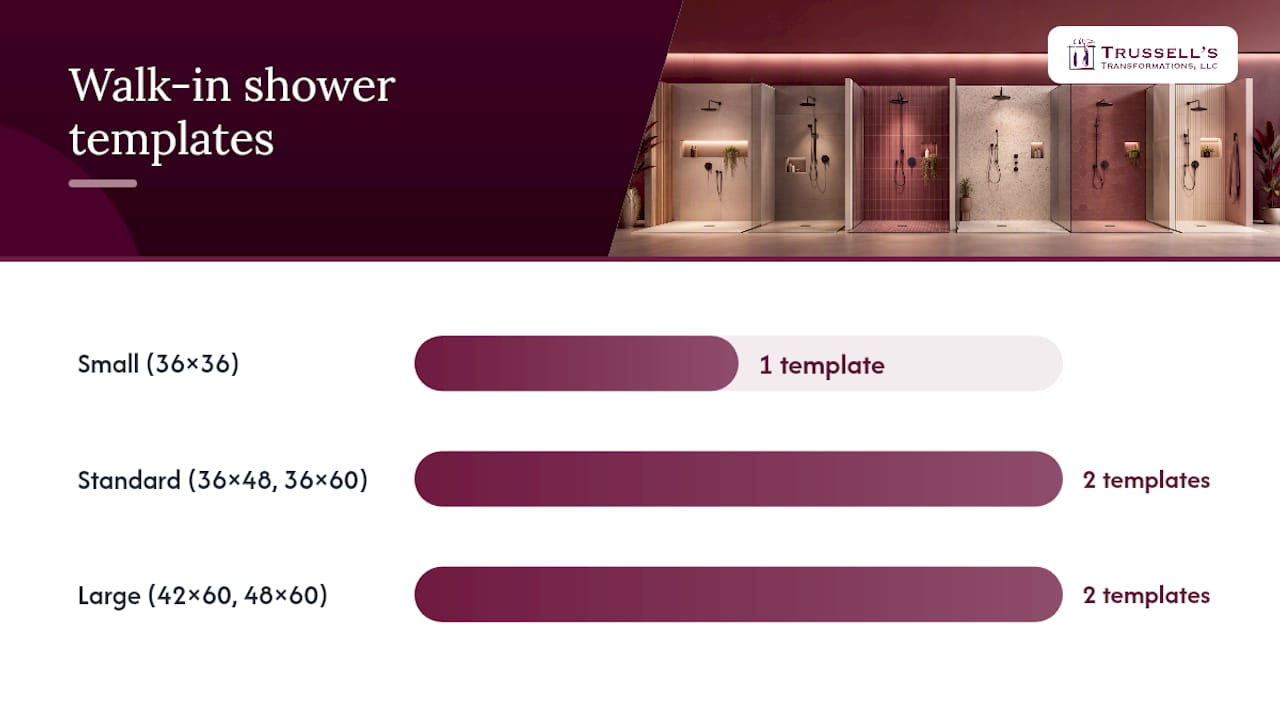
Small (36"×36") gets the job done legally and practically, but the usable floor area shrinks fast once you add a bench or a recessed niche. Many homeowners who go this route wish they had pushed the wall back a few inches during framing — a change that costs very little at rough-in but a great deal after tile is set.
Standard (36"×48" to 36"×60") is where most remodels land, and for good reason. The extra depth gives you room to turn around without touching the walls, fits a niche on the back wall without eating into usable floor area, and accommodates a fold-down bench on the short end. A 36"×60" footprint also maps cleanly onto a standard tub alcove, making tub-to-shower conversions straightforward without moving plumbing.
Large (42"×60" and up) opens up design possibilities: a full built-in bench, dual showerheads on opposite walls, and enough circulation space that two people can use the shower simultaneously without choreographing their movements.
How do doorless and curbless designs change your sizing needs?
Doorless showers are one of the most requested design choices right now, and they do require a different approach to sizing. Without a door to contain spray, the shower enclosure itself has to do that work.
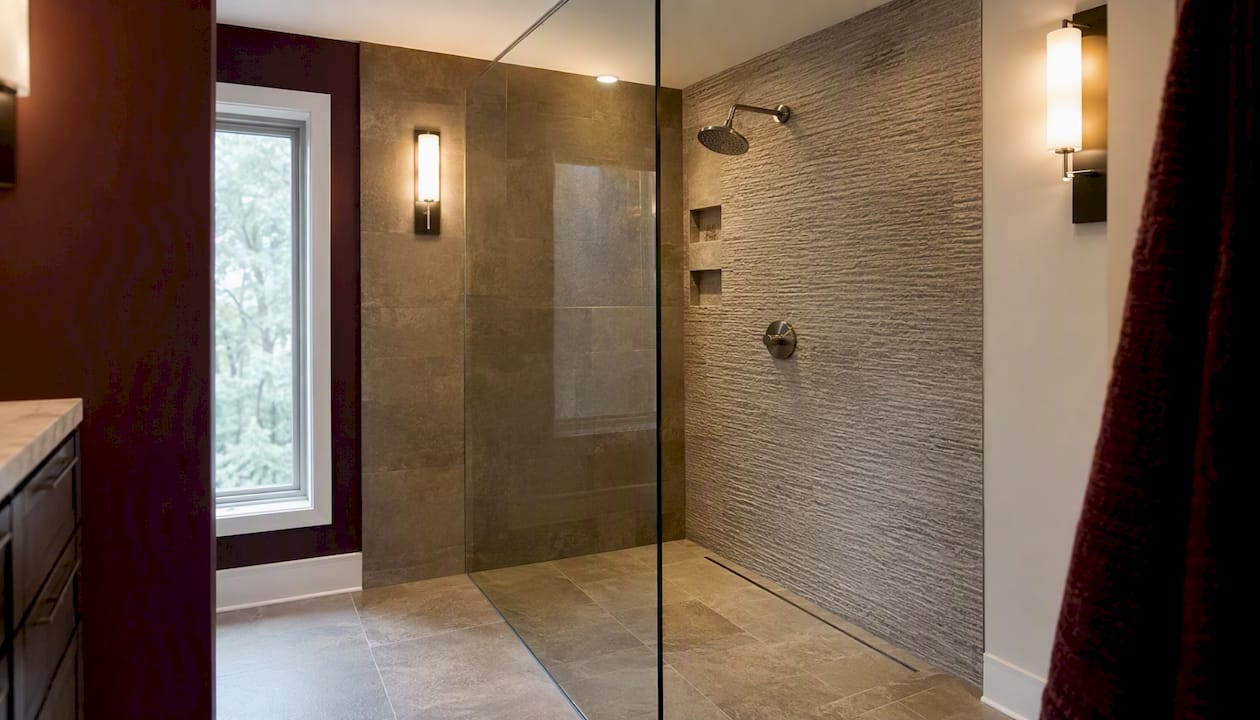
The general rule: a doorless walk-in needs at least 42"–48" of depth from the showerhead wall to the open entry. At that depth, spray from a standard fixed head stays well inside the enclosure. At 36" deep, you’ll likely see water on the bathroom floor unless you add a fixed glass panel or reposition the head to an angled side wall.
Curbless (zero-threshold) entries are a separate but related consideration. They’re excellent for accessibility and aging-in-place bathroom design, but they require a properly sloped floor that drains toward a linear or offset drain. The slope needs to be consistent across the entire wet zone, which adds complexity to the tile work and waterproofing.
Layout options that work well for curbless, doorless designs:
- Single fixed glass panel on the open side, positioned to deflect spray without fully enclosing the entry
- Offset showerhead mounted on a side wall rather than the back wall, directing spray away from the opening
- Recessed linear drain along the back or side wall, keeping the floor slope subtle and consistent
- L-shaped or corner entry that creates a natural spray barrier through the geometry of the layout
Pro Tip: Position the showerhead on the wall perpendicular to the open entry, not directly opposite it. This single change reduces splash at the opening by directing water toward the back wall and drain, and it often eliminates the need for an additional glass panel entirely.
Doorless designs are a frequent source of callbacks when depth and head placement are underestimated. A single fixed glass panel or a repositioned showerhead resolves most splash issues before they become a problem.
What do NKBA, IRC, and ADA guidelines say about shower dimensions?
Code sets the floor. Professional guidelines set the standard. Knowing both helps you avoid a failed inspection and a shower you’ll regret using.
IRC minimum (the legal floor): IRC P2708.1 requires a net interior shower floor area of at least 900 square inches — equivalent to a 30"×30" interior. Open (doorless) walk-in showers taller than 70" must have at least 36" in each interior direction. That 900-square-inch figure is the net usable area after accounting for walls, curbs, and built-in seats, which matters more than most homeowners realize.
NKBA comfort standard: The NKBA planning guidelines treat 36"×36" as the practical minimum for a comfortable shower and provide detailed planning illustrations for bench placement, grab bar locations, and accessible features. These guidelines are what designers and experienced remodelers use as their baseline, not the IRC minimum.
ADA and accessible design: Two footprint types apply here. A transfer shower (for someone who transfers from a wheelchair to a shower seat) uses a 36"×36" clear floor area. A roll-in shower (for wheelchair users who roll in directly) requires a minimum 30"×60" clear floor area. If you’re planning for long-term accessibility, the roll-in footprint is the more future-proof choice.
Checklist before finalizing dimensions:
- Confirm your local jurisdiction’s adopted code version (some municipalities use older IRC editions)
- Ask your contractor whether a permit is required and what inspections are scheduled
- Verify that your planned footprint meets the net interior area requirement after accounting for any bench or seat projection
- If planning for accessibility, check whether ADA dimensions apply (they’re mandatory for commercial; voluntary but strongly advisable for residential)
- Review NKBA guidelines for bench height, grab bar blocking, and clearance in front of the entry
| Dimension Standard | Minimum Footprint | Notes |
|---|---|---|
| IRC P2708.1 (legal minimum) | 30"×30" (900 sq in net) | Open walk-ins over 70" tall: 36" each direction |
| NKBA comfort minimum | 36"×36" | Industry best practice; used by most remodelers |
| ADA transfer shower | 36"×36" | Requires seat, grab bars, and specific clearances |
| ADA roll-in shower | 30"×60" minimum | For wheelchair users; curbless entry required |
How big should a two-person or luxury shower be?
Two-person showers need more than double the single-user footprint because circulation space matters as much as standing room. A 48"×60" footprint is the practical entry point for comfortable dual use. At 60"×60", two people can shower simultaneously without coordinating movement, and there’s room for a full built-in bench on one end.
Key feature considerations for two-person layouts:
- Separate controls: Each user needs a valve on their side of the shower. Thermostatic valves that let each person set their own temperature are worth the added cost.
- Dual drains or centered drain: Two showerheads produce significantly more water volume. A single centered drain or two linear drains along opposite walls handles the flow without pooling.
- Bench placement: A bench on the short end of a 48"×60" layout works well. In a 60"×60" layout, a full-width bench on one wall leaves a 60"×42" usable floor area, which still meets code and feels generous.
- Minimum circulation clearance: Plan for at least 36" of clear floor space between the bench and the opposite wall so both users can move freely.
For a spa-style layout, a 60"×72" or larger footprint accommodates a rain head overhead, two body spray columns on opposite walls, and a full bench — the kind of shower that becomes a genuine selling point at resale.
Which fixture and feature clearances are easy to overlook?
The measurements that most often catch homeowners off guard aren’t the overall footprint — they’re the small dimensions that determine whether the shower is actually comfortable to use.
Recommended clearances and dimensions:
- Bench depth: 15"–18" from the wall. Shallower than 15" and most adults can’t sit comfortably; deeper than 18" and it eats too much floor area.
- Bench height: 17"–19" from the finished floor, matching standard ADA seat height and comfortable for most adults.
- Built-in niche depth: 3.5"–4" (one stud bay). Deeper niches require structural modification and waterproofing on three sides instead of two.
- Niche width: 12"–24" depending on the stud spacing and how many products you store. A 14"–16" wide niche fits most standard shampoo bottles upright.
- Door opening width: 22"–24" minimum for a hinged or pivot door; 28"–32" preferred for comfort and accessibility. ADA requires 32" clear.
- Showerhead height: 80" from the finished floor is standard. For taller users or a rain head, 84"–96" is common.
Built-in features reduce your net usable floor area, and that reduction counts against the IRC’s 900-square-inch minimum. A bench that projects 15" into a 36"×36" shower leaves a net floor area well below code. The IRC calculates the minimum as usable interior area after built-in projections, so plan the bench and niche locations before you finalize the overall footprint.
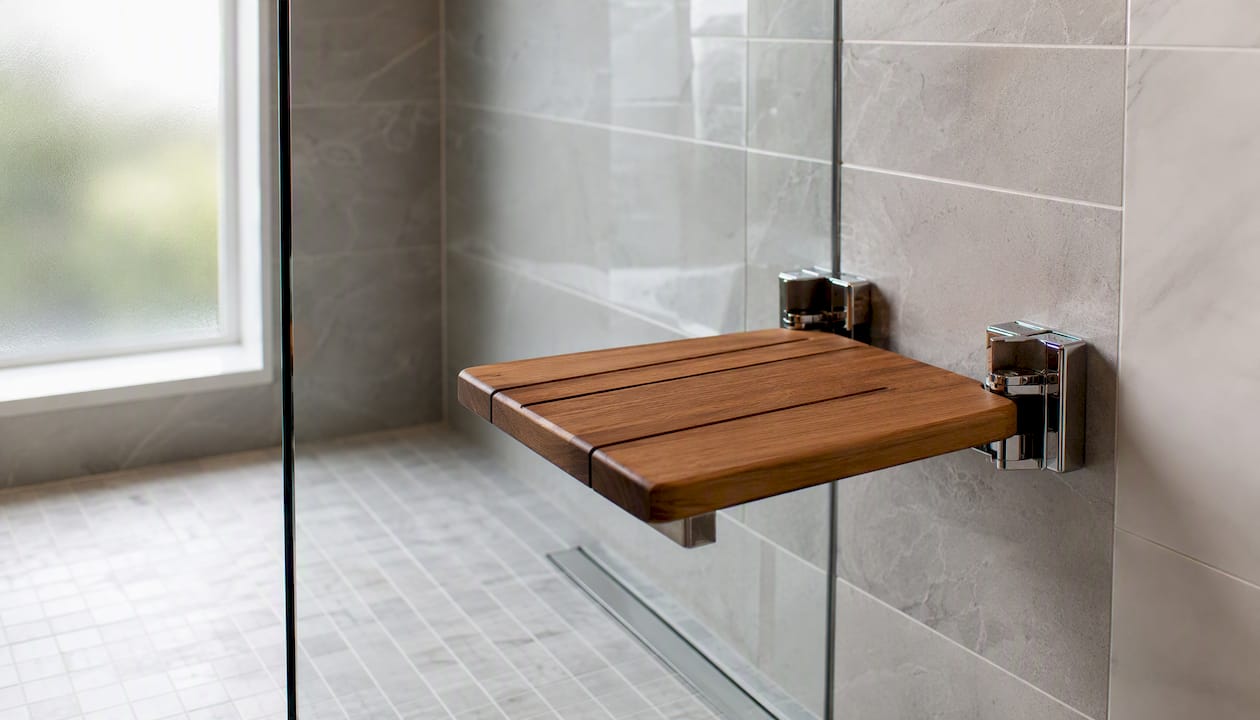
Pro Tip: If you want a bench in a smaller shower, consider a fold-down teak or stainless bench mounted to the wall rather than a built-in tile seat. It preserves your net floor area for code compliance and folds flat when not in use.
How do you choose the right shower size for your bathroom?
Start with what the space actually allows, then work toward what you want. Here’s the decision sequence we walk homeowners through before any design work begins:
- Measure finished wall-to-wall in both directions. Use the finished dimensions (after drywall and tile), not the framing rough opening.
- Subtract door clearances and fixture zones. Account for the toilet clearance (15" from center to any obstruction), vanity depth, and any swing path for doors or drawers.
- List your must-have features. Bench? Niche? Dual heads? Each one affects the net floor area and the plumbing rough-in.
- Consider future accessibility. If there’s any chance you’ll want grab bars or a roll-in entry later, rough in the blocking and the drain location now. Retrofitting is expensive.
- Compare to the standard templates. Match your available space to the 36"×36", 36"×48", 36"×60", or 42"×60" templates and see which fits with room for the features you need.
Questions to ask your contractor before finalizing:
- Can the drain stay where it is, or does it need to move? (Moving a drain is one of the biggest cost drivers.)
- Is the subfloor solid enough for a curbless transition, or does it need reinforcement?
- Are there joists or load-bearing elements that limit how far the shower wall can move?
- What permits are required, and what does the inspection schedule look like?
Red flags that signal added cost or scope creep:
- The drain is more than 12" from the planned shower center
- The existing framing doesn’t align with the new shower walls
- The subfloor shows signs of water damage or soft spots
- The planned footprint requires moving a supply line or vent stack
For a full planning checklist, the key steps for your bathroom remodel resource walks through each phase in detail.
How does shower size affect cost and installation complexity?
Size and cost scale together, but not always in the way homeowners expect. The footprint itself is only one variable. What drives cost most is what changes to make that footprint work.
Primary cost drivers that scale with size:
- Tile and surface area: More square footage of floor and wall tile means more material and more labor. Large-format tiles (24"×24" and up) cost more per square foot but require fewer grout lines and can make a small shower feel larger.
- Waterproofing membrane: A larger shower requires more membrane material and more careful detailing at corners and transitions. Curbless designs require the membrane to extend further onto the bathroom floor.
- Glass panels and doors: A larger opening requires larger glass panels, which cost more and weigh more. Frameless glass for a 60" opening costs considerably more than a standard 36" pivot door.
- Plumbing relocation: Moving the drain or adding a second supply valve is the single largest cost variable in most shower remodels.
| Size Class | Typical Relative Cost | Installation Notes |
|---|---|---|
| Small (36"×36") | Lower | Minimal tile, standard door, drain usually stays |
| Standard (36"×48"–36"×60") | Moderate | More tile, possible niche framing, drain may need adjustment |
| Large (42"×60"+) | Higher | More glass, more tile, often requires drain relocation |
| Curbless (any size) | Add cost | Subfloor work, extended membrane, linear drain |
Scenarios that spike cost most reliably: moving the drain more than 12", adding a curbless transition that requires subfloor modification, and building a structural curb where none existed. For New Mexico-specific pricing, the walk-in shower cost guide breaks down typical ranges by project type.
How Trussell’s Transformations approaches shower sizing on the job
After 25 years of bathroom remodels in Albuquerque, we’ve learned that the sizing conversation is where most projects either get set up for success or quietly set up for problems. The most common scenario we see: a homeowner wants to convert a tub alcove to a walk-in shower and assumes the existing footprint is fine. Often it is — a standard 30"×60" tub alcove maps cleanly to a 36"×60" walk-in shower with a minor wall adjustment. But occasionally the drain is offset, the subfloor has soft spots from years of tub overflow, or the homeowner wants a bench that would push the net floor area below the IRC minimum.
Our site measurement process collects:
- Finished wall-to-wall dimensions in both directions
- Drain location and distance from planned shower center
- Subfloor condition and joist direction
- Existing plumbing rough-in locations (supply and vent)
- Any structural elements (load-bearing walls, headers) that limit wall movement
Before your contractor visit, pull together a few things: photos of the existing bathroom from all four corners, any original floor plans if you have them, and a short list of the features you want (bench, niche, doorless entry, dual heads). That 15 minutes of prep saves an hour of back-and-forth on site.
What we’ve learned from sizing showers on real jobs
The most useful piece of advice we give homeowners before they finalize dimensions: measure twice, then measure again with the bench drawn in. The overall footprint looks generous on paper. The net floor area after a 15" bench projection tells a different story.
Two things we tell every homeowner before they sign off on dimensions:
First, if you’re on the fence between two size templates, go larger. The cost difference between a 36"×48" and a 36"×60" is mostly tile and a bit of glass. The comfort difference is something you’ll notice every single morning.
Second, plan grab bar blocking now even if you don’t need grab bars today. Solid blocking in the walls costs almost nothing at rough-in and gives you the option to add bars later without opening the tile. It’s the kind of detail that makes a shower genuinely future-proof — and it’s one of the first things we recommend on every project, whether the homeowner is planning for accessibility or not.
Ready to plan your walk-in shower with Trussell’s Transformations?
Knowing the right dimensions is step one. Getting them built correctly — with proper waterproofing, code-compliant framing, and tile work that holds up for decades — is where skilled craftsmanship makes the real difference.

Trussell’s Transformations handles every phase of a shower remodel in Albuquerque: site measurement, permit coordination, plumbing rough-in, waterproofing, tile installation, and glass panel fitting. Whether you’re converting a tub alcove to a 36"×60" walk-in or building a custom 60"×60" spa shower from scratch, we bring 25 years of local remodeling experience to every project. Our team works transparently, stays on budget, and gives you a clear picture of scope before a single tile is set.
Start with the key steps for your bathroom remodel to prepare for your consultation, or visit our home remodels page to see the full scope of what we offer. When you’re ready, reach out for a local quote and we’ll schedule a site measure at your convenience.
Sources
These sources cover the code text, professional planning standards, and practical guidance referenced throughout this article. Local building departments may interpret or amend these standards, so always confirm requirements with your jurisdiction before finalizing plans.
Recent Comments