

The Ultimate Guide to Putting in Butcher Block Countertops
What You Need to Know Before Starting a Butcher Block Install
A butcher block install is one of the most rewarding kitchen upgrades a homeowner can take on — but it demands more planning than most people expect.
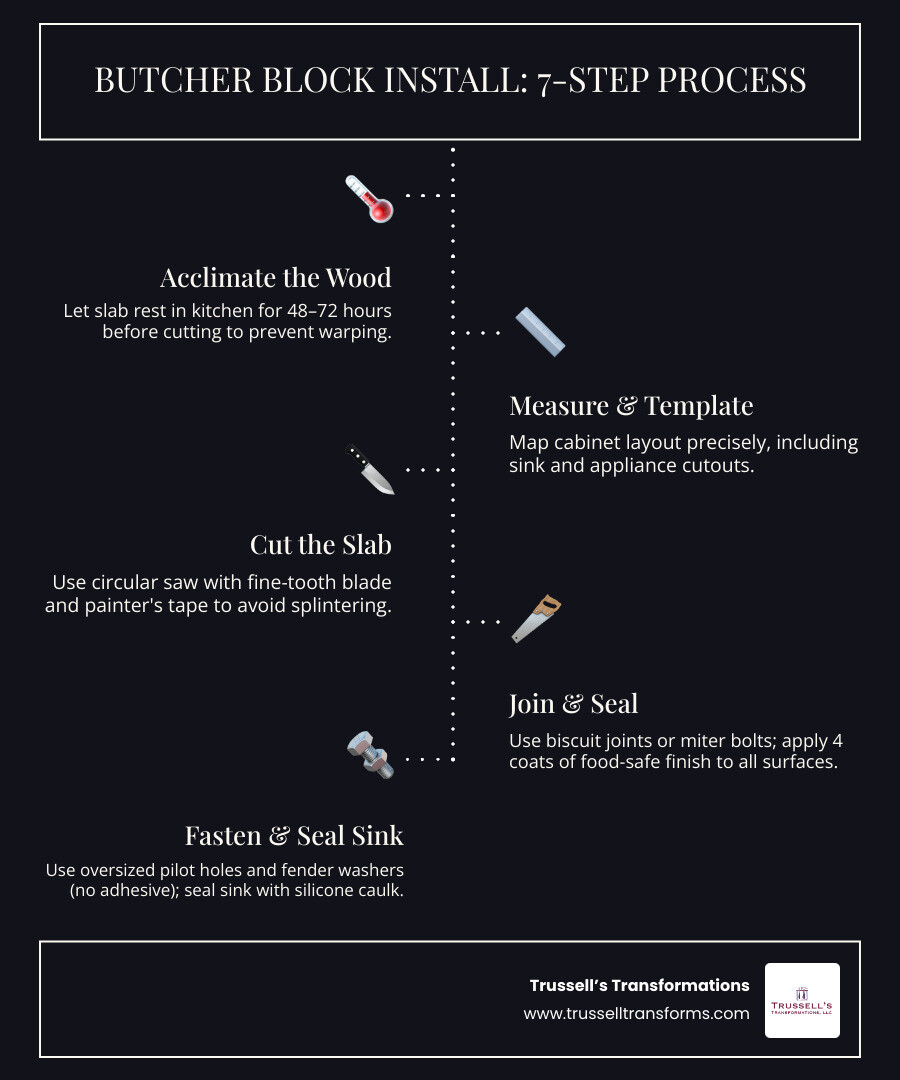
Here is a quick overview of how it works:
- Acclimate the wood — let the slab rest in your kitchen for 48 to 72 hours before touching it
- Measure and template — map your cabinet layout precisely, including sink and appliance cutouts
- Cut the slab — use a circular saw with a fine-tooth blade and painter’s tape for a clean, professional edge
- Join multiple pieces — use biscuit joints, miter bolts, or pocket holes for L-shaped layouts
- Seal all surfaces — apply at least four coats of food-safe finish to every side, including the underside
- Fasten to cabinets — use oversized pilot holes and fender washers, never construction adhesive
- Seal around the sink — use clear silicone caulk and allow 48 hours to cure before use
Butcher block countertops can last 20 to 30 years with proper care — three times longer than laminate. But that lifespan depends almost entirely on how well the installation is done from the start.
Wood is a living material. It expands and contracts with humidity and temperature changes throughout its entire life. Proper acclimation and expansion gaps ensure your countertop remains perfectly aligned and beautiful for decades.
This guide walks you through every stage of the process, from choosing the right wood species to the final coat of oil. Whether you’re a confident DIYer or weighing whether to hire a professional, you’ll find everything you need here.
Pros and Cons of Butcher Block vs. Premium Countertops
When planning a kitchen remodel in 2026, choosing the right surface is one of the most significant decisions you will make. While wood brings undeniable warmth, it is important to weigh it against other high-end options like quartz and granite to see how they fit your lifestyle and budget.
If you are currently weighing your options, our guide on how to Consider This When Choosing New Countertops for Your Kitchen can help clarify your priorities. Additionally, if budget is your main driver, explore our advice on Kitchen Countertops on a Budget and Where to Find Them.
| Countertop Material | Average Lifespan | Maintenance Level | Heat & Scratch Resistance | Relative Cost |
|---|---|---|---|---|
| Butcher Block (Hardwood) | 20–30 Years | High (Regular oiling/sealing) | Moderate (Easily refreshed with sanding) | Moderate ($20–$70/sq. ft.) |
| Quartz (Engineered) | 30+ Years | Extremely Low (Zero sealing) | High | Premium |
| Granite (Natural Stone) | 50+ Years | Low (Annual sealing) | Excellent | Premium |
| Laminate | 10 Years | Low | Low | Budget |
The Natural Appeal of Hardwood
Wood countertops provide a rustic, inviting aesthetic that stone simply cannot replicate. The durability of a wood surface is determined by its Janka hardness rating, which measures the force required to embed a steel ball into the wood. Hardwoods like maple (1,450 lbf) and oak (1,290 lbf) are incredibly durable and highly recommended for kitchen environments. In contrast, softwoods like pine (380 lbf) are less dense, making hardwoods the superior choice for kitchen environments.
With proper maintenance, a quality hardwood butcher block can last up to three decades. Because hardwoods feature dense, close-grain patterns, they naturally resist moisture absorption better than open-grain woods like ash, which absorb water rapidly.
Why Quartz and Granite Reign Supreme
While we love the charm of wood, premium stone and engineered surfaces represent the pinnacle of performance and longevity. At our showroom, we feature industry-leading brands including Caesarstone, Cambria, Silestone, and The Stone Collection.
Quartz and granite outclass laminate countertops in every measurable metric. Laminate has a shorter lifespan and offers less design flexibility compared to premium surfaces. In contrast, quartz is non-porous, highly resistant to staining, and requires absolutely zero ongoing maintenance. Granite offers unmatched heat resistance and a unique, luxurious natural beauty. If you want a kitchen that looks flawless with minimal upkeep, premium stone remains the gold standard.
Planning and Preparing for Your Butcher Block Install
A successful butcher block install starts long before you pick up a saw. Wood is highly sensitive to its environment, meaning preparation is key to ensuring a seamless and long-lasting installation.

Before making any purchases, we highly recommend checking out The Ultimate 2026 Kitchen Renovation Cost Guide (Without the Heart Attack) to align your expectations, as well as our 5 Tips for a Timeless Kitchen to ensure your design stands the test of time.
The Importance of Paid Estimates and Design Renderings
One of the most common mistakes homeowners make is skipping the professional planning phase to save a few dollars upfront. At Trussell’s Transformations, we believe that paying for a comprehensive estimate — which includes detailed 3D design renderings — is one of the smartest investments you can make.
These renderings show you exactly how your countertops will interact with your cabinets, appliances, and lighting. Spending time and resources in the planning phase minimizes costly errors, ensures perfect material orders, and ultimately saves you thousands of dollars by avoiding mistakes during the physical installation.
Preparing Your Space for a Butcher Block Install
Before your new countertops arrive, your cabinets must be perfectly level and secured. Any slight dip or twist in the cabinet base will affect the alignment of the wood, so a perfectly level foundation is essential. We carry premium cabinet lines like Durasupreme Cabinetry, Waypoint Living Spaces, Sollid Cabinetry, and Kitchen Cabinet Distributors to ensure a structurally sound foundation. For more on this, read our guide on Can I Install Cabinets Myself? DIY Guide to Cabinet Installation.
Once your cabinets are set, you must acclimate your butcher block. Unbox the wood and let it rest in the room where it will be installed for 48 to 72 hours (or up to 7 days in highly dry climates like Albuquerque). To ensure even airflow to both sides during acclimation, support the slabs on 2×4 wood pieces placed on edge, spaced 18 inches apart. The ideal indoor moisture content of the wood should stabilize between 6% and 8% before you begin cutting.
Step-by-Step Guide to a Successful Butcher Block Install
If you are ready to tackle the physical installation, follow these precise steps to ensure a flawless fit and finish.
Measuring, Templating, and Cutting the Wood
Do not rely on simple tape measurements alone; walls are rarely straight or square.
- Create a physical template: Use strips of cardboard or thin plywood hot-glued together to map out the exact footprint of your cabinets, including any wall irregularities.
- Transfer and protect: Lay your template onto “Side A” (the blemish-free face) of your butcher block. Apply blue painter’s tape firmly over your planned cut lines to ensure the circular saw leaves a perfectly clean, smooth edge.
- Cut to size: Use a circular saw with a fine-toothed, carbide blade (at least 40 teeth) guided by a straight-edge rail. Set your blade depth to extend exactly 1/4 inch below the bottom of the countertop to ensure a clean cut.
- Create sink and cooktop cutouts: Trace your sink template. Drill 3/8-inch pilot holes in the corners from the bottom up, flip the slab, and use a jigsaw to connect the holes. Remember to maintain a 1/4-inch clearance around sinks and cooktops to allow for natural wood movement.
- Establish expansion gaps: Always leave a 1/8-inch expansion gap between the wood and any walls or adjacent hard surfaces.
Joining Multiple Slabs and Sealing Edges
If your kitchen layout is L-shaped or requires joining multiple slabs, you must use a strong mechanical joint.
We recommend using a combination of biscuit joints (to keep the surfaces flush) and miter bolts or jointing bolts underneath (to pull the seam tightly together). Apply a high-quality waterproof wood glue, like Titebond III, to the joint if the wood grains run parallel. If you are joining butt joints with opposing grain directions, use clear silicone sealant instead of wood glue to allow the pieces to shift independently as the wood naturally expands and contracts.
Crucially, you must seal every freshly cut edge immediately. The end grain of wood acts like a bundle of straws, absorbing moisture rapidly. Apply multiple coats of finish to these cutouts to ensure a fully sealed, water-resistant barrier.
Securing the Countertop to Cabinets Without Restricting Movement
Wood expands and contracts across its width, but not its length. In dry winter climates, a 25-inch-wide countertop can shrink by as much as 1/8 inch, while high summer humidity can cause it to expand by up to 3/16 inch.
To accommodate this movement:
- Never use construction adhesive to glue the countertop directly to your cabinets.
- Drill oversized 3/8-inch expansion holes in your cabinet corner blocks.
- Secure the countertop from underneath by driving #10 pan head screws through 1.5-inch fender washers into the underside of the wood.
- Tighten the screws until they are snug, then back them off a quarter-turn. The oversized holes and washers allow the screws to slide microscopically as the wood expands and contracts, maintaining a perfectly flat surface.
Finishing, Sealing, and Long-Term Maintenance
Applying the right finish is what makes your countertop durable, beautiful, and food-safe.
Sealing Around Sinks, Faucets, and Backsplashes
Water is the ultimate enemy of wood. If you install an undermount sink, you must coat the exposed inner wood rim with multiple coats of water-resistant polyurethane or specialized tung-oil-based sealers like Waterlox. Apply a thick bead of clear, mold-resistant silicone caulk between the sink rim and the underside of the wood to create a watertight seal.
When installing a backsplash, attach it directly to the countertop surface rather than the wall, or leave a small gap sealed with flexible silicone to accommodate the wood’s movement.
Additionally, protect the underside of the countertop from heat and steam emitted by dishwashers or under-counter ovens. Attach self-adhering aluminum flashing or moisture-barrier tape to the underside of the wood directly above these appliances to deflect rising heat and steam.
Ongoing Maintenance and Care
If you choose a natural oil finish (like food-safe mineral oil or beeswax), you must commit to a routine maintenance schedule to keep the wood looking rich and fully hydrated:
- First week: Apply oil daily.
- First month: Apply oil weekly.
- Thereafter: Apply oil monthly, or whenever the wood begins to look dull or fails to bead water.
Always wipe up spills immediately, especially acidic liquids like wine, vinegar, or citrus juices, to preserve the pristine appearance of the wood.
Frequently Asked Questions about Butcher Block Installation
How long should butcher block acclimate before a butcher block install?
Your butcher block should acclimate in the room where it will be installed for 48 to 72 hours (and up to a week in extremely dry climates). Keep it flat, supported by 2x4s, to ensure equal airflow to both sides.
Can you use adhesive to secure butcher block countertops?
No, you should never use construction adhesive or silicone to glue a butcher block countertop down to your cabinets. Restricting the wood’s natural movement with glue prevents it from expanding and contracting naturally. Always use mechanical fasteners with oversized pilot holes to allow for this natural movement.
How do you protect butcher block from dishwasher heat?
To protect your wood from heat and steam, apply self-adhering aluminum flashing or steam-shield tape to the underside of the countertop directly above the dishwasher.
Conclusion
A butcher block install brings an unmatched organic warmth to any kitchen, but achieving a flawless, long-lasting result requires precision, patience, and a deep understanding of how wood behaves.
If you want the gorgeous look of premium countertops without the DIY stress, let our team of licensed contractors handle the heavy lifting. With over 25 years of experience, Trussell’s Transformations is your premier one-stop shop in Albuquerque, NM, Rio Rancho, NM, and across Bernalillo County, NM.
We invite you to visit our showroom at 8023 Edith Blvd NE, Albuquerque, NM 87113 to explore our incredible selection of premium cabinets and stone countertops. We offer custom design renderings, professional installation, and 0% financing to make your dream kitchen a reality.
Ready to transform your kitchen? Explore our Countertops in Albuquerque NM page or visit our Countertop Services portal to schedule your professional design consultation today!
Recent Comments