

Transform Your Bathroom With a Vanity Unit Installation
Vanity unit installation is one of the most impactful upgrades you can make to a bathroom — improving storage, style, and everyday function all at once.
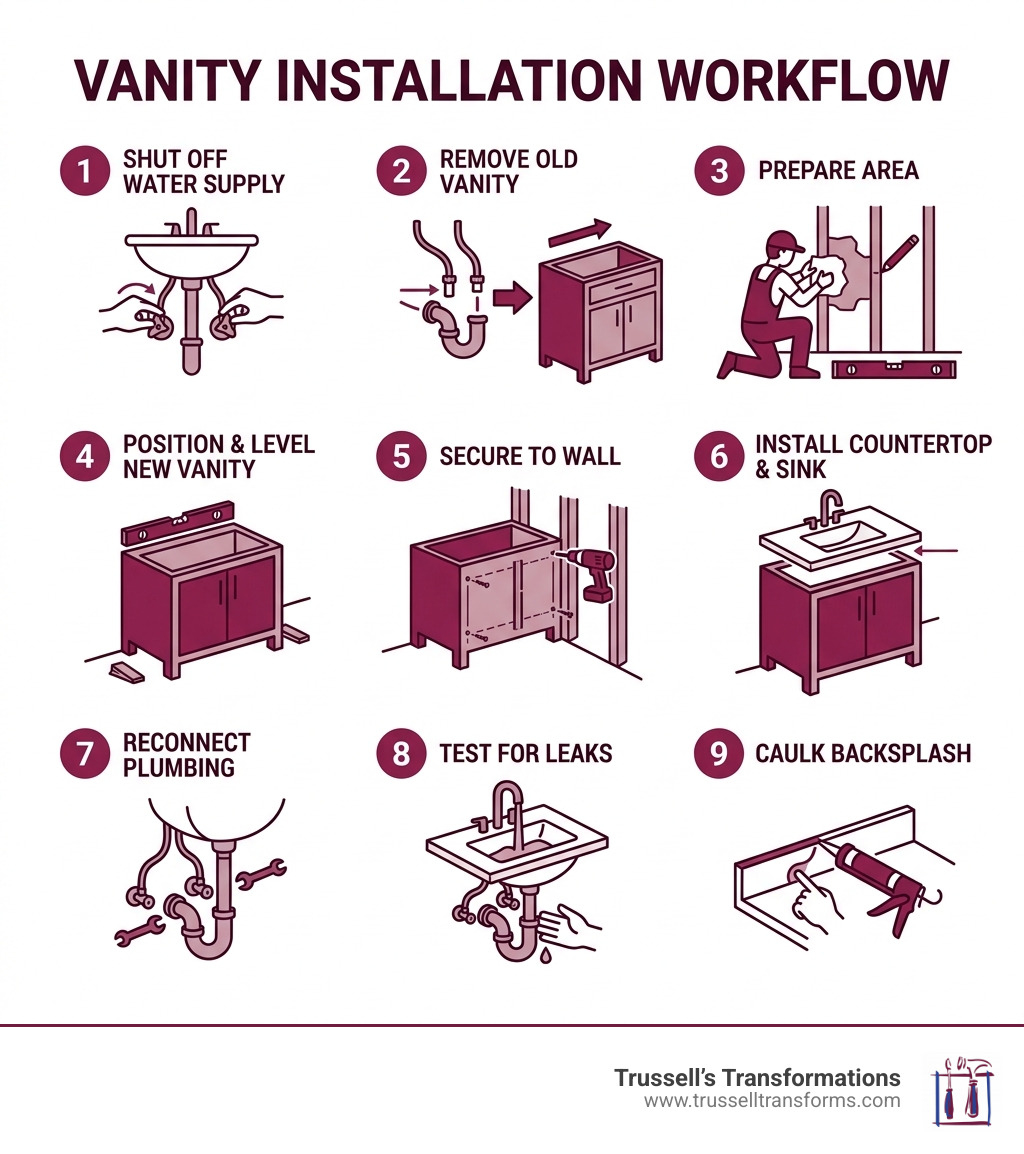
Here’s a quick overview of the vanity unit installation process:
- Turn off the water supply at the shutoff valves
- Remove the old vanity — disconnect the P-trap, supply lines, and cut any caulk seals
- Prepare the area — repair walls, locate studs, and check for a level floor
- Position and level the new vanity — use shims where needed
- Secure to the wall — screw into studs or use heavy-duty wall anchors
- Install the countertop, sink, and faucet — seal with silicone caulk
- Reconnect the plumbing — attach supply lines and P-trap
- Test for leaks — turn water back on and check all connections
- Caulk the backsplash — finish edges for a clean, watertight seal
Most DIYers can complete a straightforward vanity swap in 6 to 8 hours. More complex installs — like floating vanities or jobs requiring plumbing changes — can take longer or benefit from a professional.
This guide walks you through every step. Whether you’re tackling it yourself or deciding when to call in a licensed contractor, you’ll know exactly what’s involved.
Planning Your Vanity Unit Installation
Before you pick up a drill or even head to our Albuquerque showroom, planning is the foundation of a successful vanity unit installation. We often see homeowners fall in love with a piece of furniture only to realize it blocks the bathroom door or doesn’t align with existing pipes.
Start by assessing your layout. Is your current plumbing centered? If you choose a new vanity that is significantly different in size or configuration, you might need to move water supply lines or the drain, which quickly turns a DIY weekend project into a job for a licensed plumber. We always recommend The Ultimate Guide to Bathroom Remodeling to help you visualize how the vanity fits into the larger scope of your renovation.
Choosing the Right Vanity Unit Installation Size
Size matters, and not just for aesthetics. Standard vanity widths typically come in 24″, 30″, 36″, 48″, and 60″, with double vanities reaching up to 72″.
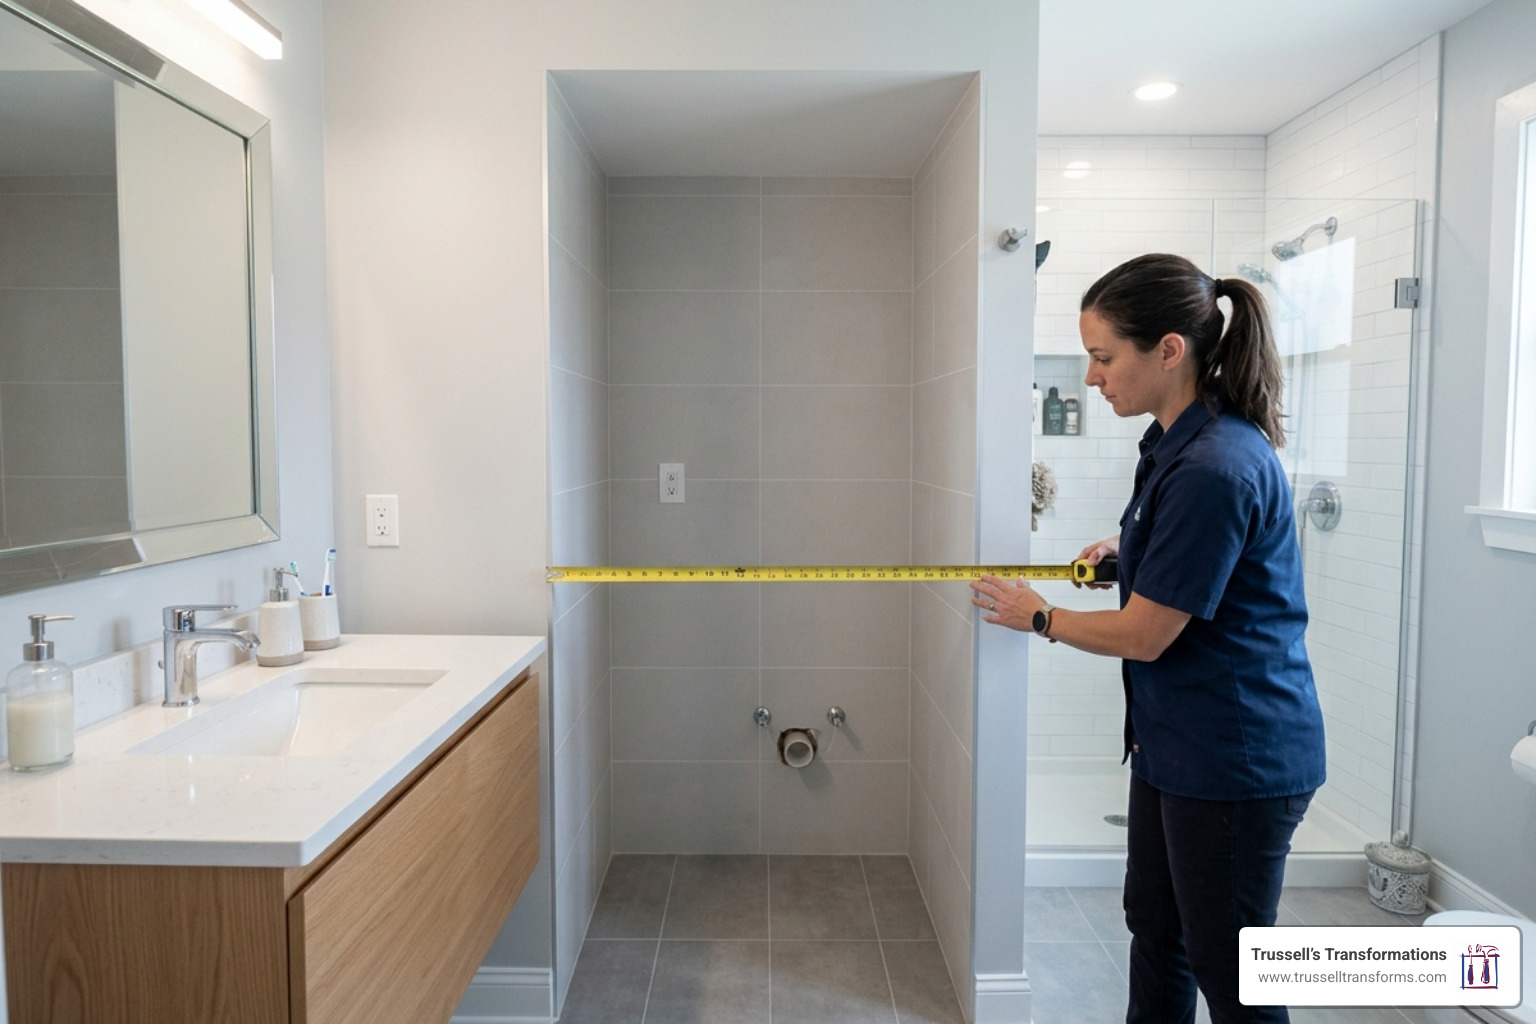
When measuring, consider these three dimensions:
- Width: Ensure you have enough clearance for the bathroom door to swing freely and for you to stand comfortably at the sink.
- Depth: Standard depth is 21 inches, but if you have a narrow bathroom in a historic Albuquerque home, you might look for an 18-inch “slim” model.
- Height: Modern “comfort height” vanities are usually 36 inches tall, while older styles were 30-32 inches.
Don’t forget the “swing zone.” Open the drawers and doors of your potential new unit to ensure they won’t hit the toilet or the tub. For more on planning these details, check out the Key steps for your bathroom remodel.
Selecting the Best Vanity Type for Your Space
There are three primary styles to consider for your vanity unit installation:
- Free-Standing: These sit on the floor (sometimes on legs) and are the easiest to install. They offer the most storage and hide plumbing completely.
- Floating (Wall-Mounted): These are secured only to the wall, leaving the floor underneath visible. This creates an airy, modern feel and makes a small bathroom look larger. However, they require significant wall reinforcement (blocking) to hold the weight.
- Furniture-Style: These look like a chest of drawers or a console table. They add a custom, high-end look but often have less storage due to the leg design.
Essential Tools and Preparation
You wouldn’t bake a cake without checking for flour, and you shouldn’t start a vanity unit installation without the right gear. Gather these tools before you turn off the water:
- Stud finder (crucial for safety!)
- Spirit level (to prevent your soap from sliding off the counter)
- Tape measure
- Power drill and bits
- Adjustable wrench and pliers
- Bucket and rags (to catch “old” water in the pipes)
- Silicone caulk and a caulk gun
- Wood shims
- PVC primer and cement (if replacing the P-trap, ensuring you follow International Plumbing Code standards for drainage)
If you’re feeling a bit nervous about the technical side, read our guide on Can I install cabinets myself? to gauge your comfort level.
Removing the Old Vanity Safely
First, shut off the water valves under the sink. Turn them clockwise until they stop. Open the faucet to release pressure.
Place your bucket under the P-trap (the U-shaped pipe) and unscrew the large plastic nuts. Be prepared—this water can be a bit smelly! Once the plumbing is disconnected, use a utility knife to slice through the caulk seal between the vanity top and the wall. If the top is glued down, you may need a pry bar and a hammer to gently pop it off. Finally, unscrew the cabinet from the wall.
This is a great time to inspect for mold or water damage. For professional help with cabinetry issues, see our cabinet services.
Preparing the Installation Area
Once the old unit is gone, you’ll likely see a “scar” on the wall or floor. Patch any holes with spackle and paint the area now—it’s much easier to paint a bare wall than to cut in around a new cabinet.
Use your stud finder to locate the wall studs and mark them with a pencil. Most vanities have a mounting rail at the back; you’ll need to screw through this rail directly into those studs. Also, check if your floor is level. If it isn’t, don’t worry—that’s what shims are for. We have a great resource on Proper cabinet installation tips that covers these structural basics in detail.
Step-by-Step Guide to Securing the Unit
Now for the main event: the actual vanity unit installation.
Slide the new cabinet into place. Place your spirit level across the top. If it’s leaning, slide wood shims under the base until it’s perfectly level front-to-back and side-to-side. Once leveled, drill pilot holes through the back rail and into the wall studs you marked earlier. Drive 3-inch cabinet screws through the rail to secure the unit.
Perfecting the Vanity Unit Installation Plumbing
If the back of your vanity is solid, you’ll need to measure the distance of your pipes from the floor and the side wall, then use a hole saw to cut openings in the back panel.
Pro Tip: Install the faucet and the drain assembly onto the vanity top before you put the top on the cabinet. It is much easier to tighten those nuts when you aren’t laying on your back inside a dark cupboard!
Once the top is on, reconnect the water supply lines to the faucet and the P-trap to the sink drain. Hand-tighten the plastic nuts, then give them a quarter-turn with pliers. Don’t overdo it, or you’ll crack the plastic. For more local advice, check out bathroom remodels in Albuquerque.
Installing the Top and Sealing the Edges
Most vanity tops are secured with a simple bead of silicone caulk along the top edge of the cabinet. Set the top down, ensure it’s centered, and let it cure.
The final touch of a professional vanity unit installation is the caulking. Apply a thin, steady bead of silicone where the vanity top meets the wall and where the backsplash meets the wall. Smooth it with a wet finger for a clean finish. This prevents water from seeping behind your cabinet and causing rot. See our countertop services for more on choosing the right materials.
Premium Materials: Cabinets and Countertops
At Trussell’s Transformations, we believe the quality of the materials is just as important as the installation itself. A DIY project using low-grade “big box” materials often ends in warped doors and stained counters within a few years.
We carry world-class cabinetry brands known for their durability and moisture resistance, including:
- Durasupreme Cabinetry: Highly customizable with stunning finishes.
- Waypoint Living Spaces: Excellent balance of style and value.
- Sollid Cabinetry: Known for robust construction.
- Kitchen Cabinet Distributers: Great for quick-turnaround projects.
For the surfaces, we offer the “gold standard” in stone and quartz:
- Caesarstone, Cambria, and Silestone: These quartz surfaces are non-porous, meaning they won’t soak up makeup or toothpaste stains.
- The Stone Collection: For those who want the unique, natural beauty of granite or marble.
You can browse these options in our bathroom remodel category.
Why Professional Installation Outperforms DIY
While we love a good DIY project, there’s a significant difference between “installed” and “installed correctly.” Vanity unit installation often involves hidden complexities.
Why hire a pro?
- Accountability: If a DIY pipe leaks, it’s on you. If our licensed contractors install it, we stand behind the work with a warranty.
- Structural Integrity: Floating vanities are heavy. If they aren’t anchored with proper wood blocking inside the wall, they can literally pull the drywall down.
- Code Compliance: Plumbing codes in Albuquerque and Rio Rancho ensure your home stays safe and maintains its resale value.
- The Finish: Getting those tiny gaps perfectly sealed and the doors perfectly aligned takes years of practice.
If you want the peace of mind that comes with 25+ years of experience, you can Hire a professional for cabinet installation.
Frequently Asked Questions about Vanity Unit Installation
How long does a typical DIY vanity installation take?
For a standard floor-standing unit where the plumbing aligns, expect to spend 6 to 8 hours. This includes removal, prep, and installation. If you need to patch and paint the wall or modify the plumbing, it can easily turn into a multi-day project.
Can I install a floating vanity on any wall?
Not without preparation. Floating vanities require “blocking”—horizontal 2×4 supports installed between the wall studs—to handle the weight. They are typically installed so the countertop is 28 to 36 inches from the floor, which aligns with ADA accessibility guidelines for comfortable use. Without proper support, the vanity will sag or fail.
What are the most common mistakes to avoid?
- Overtightening: This is the #1 cause of leaks and cracked fixtures.
- Ignoring the Level: An unlevel vanity causes the sink to drain poorly and doors to swing open on their own.
- Poor Caulking: If you don’t seal the edges, water will get behind the unit, leading to mold.
- Wrong Screws: Always use cabinet screws into studs; never rely on simple drywall anchors for a heavy vanity.
Conclusion
Whether you decide to master the DIY setup or prefer the “done-for-you” luxury of professional service, a new vanity will breathe new life into your home. At Trussell’s Transformations, we’ve been the one-stop shop for Albuquerque, Rio Rancho, and Bernalillo County homeowners for over 25 years.
From our wide selection of premium brands like Waypoint and Cambria to our 0% financing options, we make it easy to get the bathroom you deserve. Ready to take the next step? Visit our showroom at 8023 Edith Blvd NE or Schedule your professional vanity unit installation today!
Recent Comments