

Benefits and Planning: DIY vs Pre-Made Shelves
Converting deep, dark pantry cabinets into slide-out storage solves one of the most common kitchen frustration points: items getting lost in the back. Standard fixed shelves often turn into storage “black holes,” where canned goods expire long before they are noticed. When you install pull out shelves in pantry spaces, you bring every item out into direct sight and comfortable reach.
Beyond simple convenience, adding sliding trays maximizes usable storage capacity. Instead of leaving massive vertical gaps between fixed shelves, you can stack pull-out drawers closer together while maintaining complete accessibility to every shelf. For detailed cabinet hardware strategies, check out our guide on installing pull out cabinet drawers.
Why Homeowners Choose to Install Pull Out Shelves in Pantry
The primary motivation for retrofitting a pantry is accessibility. Reaching into a 24-inch deep cabinet requires awkward bending, kneeling, or shuffling items around. Sliding shelves extend fully, allowing you to access items from the front, left, or right side without crouching on the floor.
This ergonomic advantage makes roll-out shelving a cornerstone of aging-in-place kitchen design. Seniors or anyone dealing with arthritis or back strain benefit significantly from bringing stored goods directly out to shoulder or elbow height. Eliminating the need to reach deep into dark lower cabinets reduces physical strain and prevents loss of balance.
Pre-Made Shelf Kits vs DIY Drawer Boxes
When planning your project, you must decide whether to build custom DIY drawer boxes from scratch or purchase pre-made shelf kits. Building your own allows complete customization of wood species, depth, and edge height. Baltic birch plywood is widely considered the top choice for custom drawer construction because its void-free core provides exceptional strength and neat, layered edge profiles.
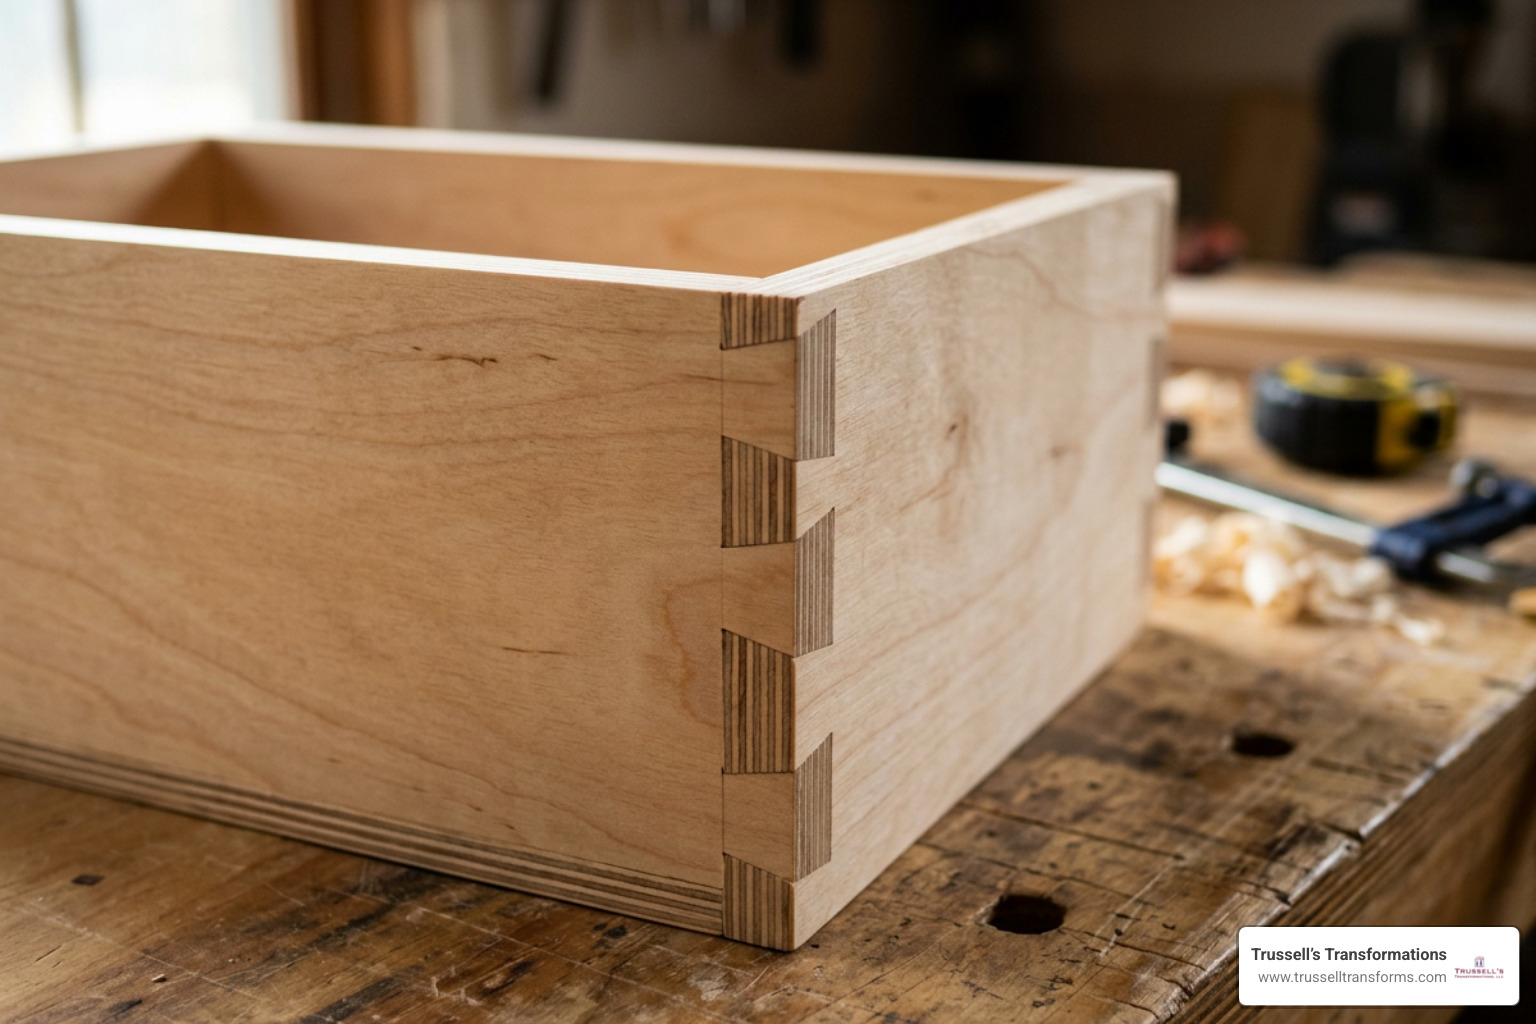
- Pre-made Dovetail Drawers: Buying pre-assembled solid wood dovetailed drawers (often around $35 for standard maple boxes) saves substantial time while delivering high-end craftsmanship.
- Custom Woodworking: Building custom boxes with a 3/4-inch plywood base and 1×3 pine or hardwood frames using pocket hole joinery is budget-friendly, typically costing $50 to $90 per shelf in raw materials.
- Pre-Assembled Kits: Kit options range from basic wire baskets up to full custom wood shelf packages ($379 for basic 5-pack custom sets up to $499 for 10-pack premium kits).
Measuring Your Pantry and Selecting Drawer Slides
Accurate measuring is the single most critical step when preparing to install pull out shelves in pantry cabinets. A fraction-of-an-inch math error can cause hardware binding or keep your drawer boxes from clearing swinging cabinet doors.
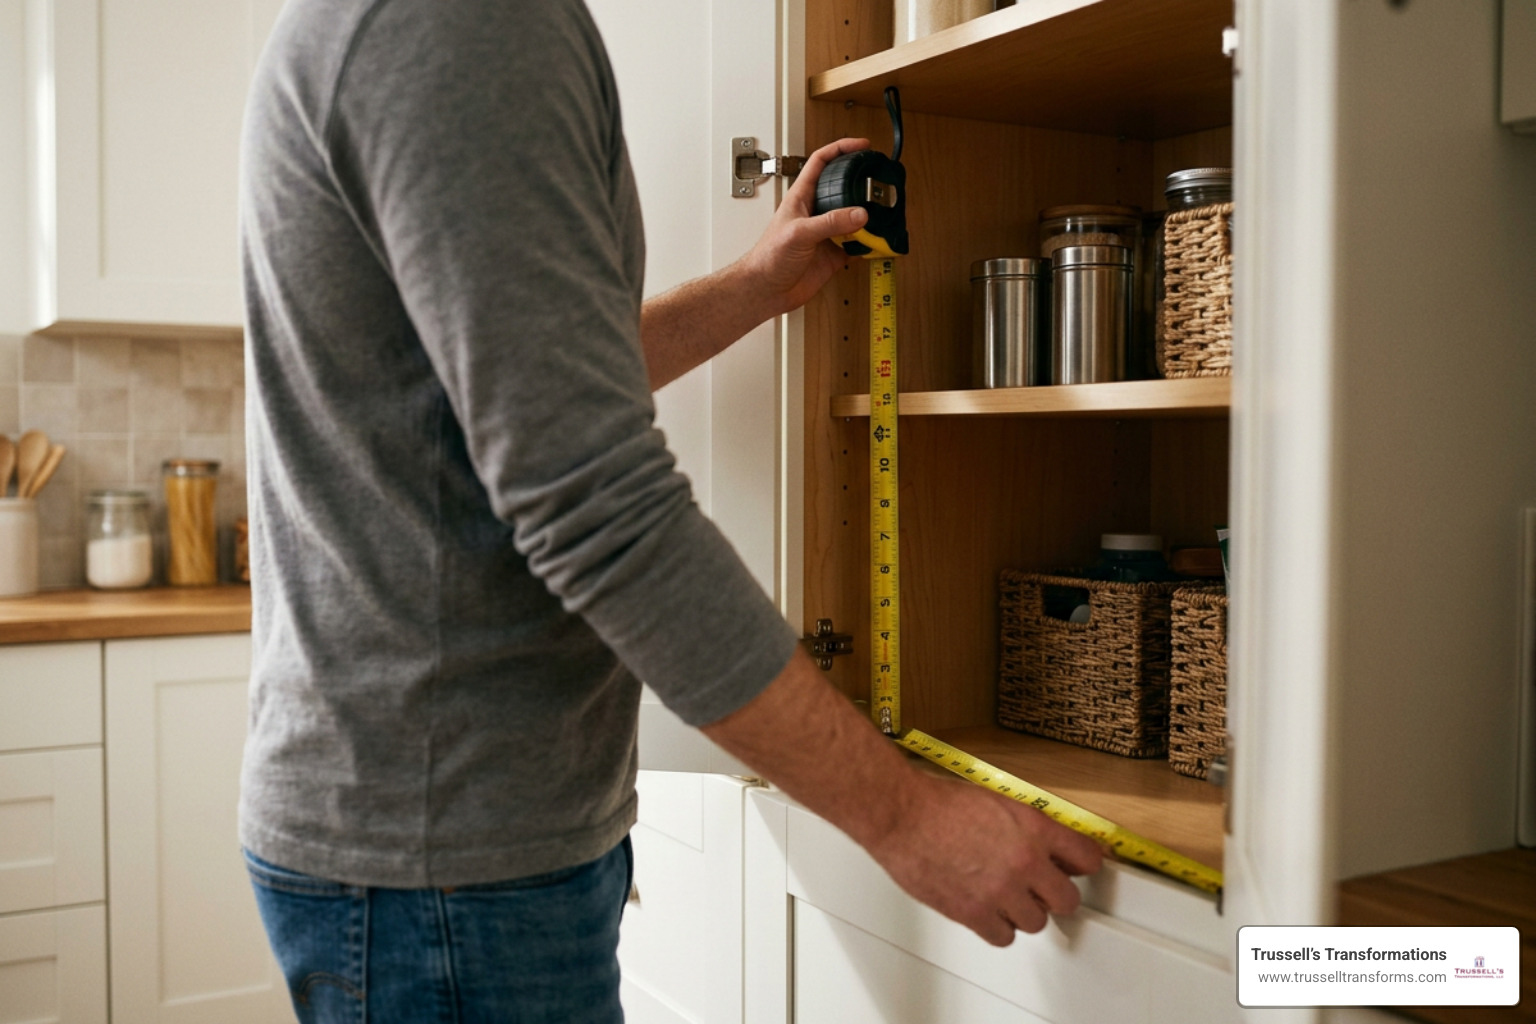
Measuring Pantry Opening and Door Clearance
Do not rely on the exterior cabinet dimensions. Open the pantry doors completely and measure the absolute narrowest point of entry.
- Clear Width: Measure the width from side-to-side at the narrowest point, checking both the top and bottom of the opening.
- Door and Hinge Obstructions: Account for doors that do not open fully past 90 degrees or hinges that protrude into the doorway space. Measure from the innermost edge of the extended hinge to the opposite cabinet frame or hinge.
- The 1-Inch Clearance Rule: Subtract approximately 1 inch total from the clear opening width (or 1/2 inch on each side) to accommodate mounting brackets, standoff cleats, and drawer slide hardware.
- Cabinet Depth: Measure from the front interior edge of the frame to the back wall, taking note of rear obstructions like plumbing, cooktop gas lines, or unaligned back panels. Standard slide hardware depths range from 16 to 22 inches.
To avoid math mistakes, master tradespeople often use a “story stick”—a scrap piece of wood marked directly with physical pencil lines representing your drawer sides, slide clearances, and frame boundaries.
Choosing the Right Drawer Slides for Heavy Goods
Selecting the proper slide mechanism ensures your shelves hold heavy canned goods without sagging or binding. Review our comprehensive guide on attaching drawer slides for detailed weight ratings and hardware styles.
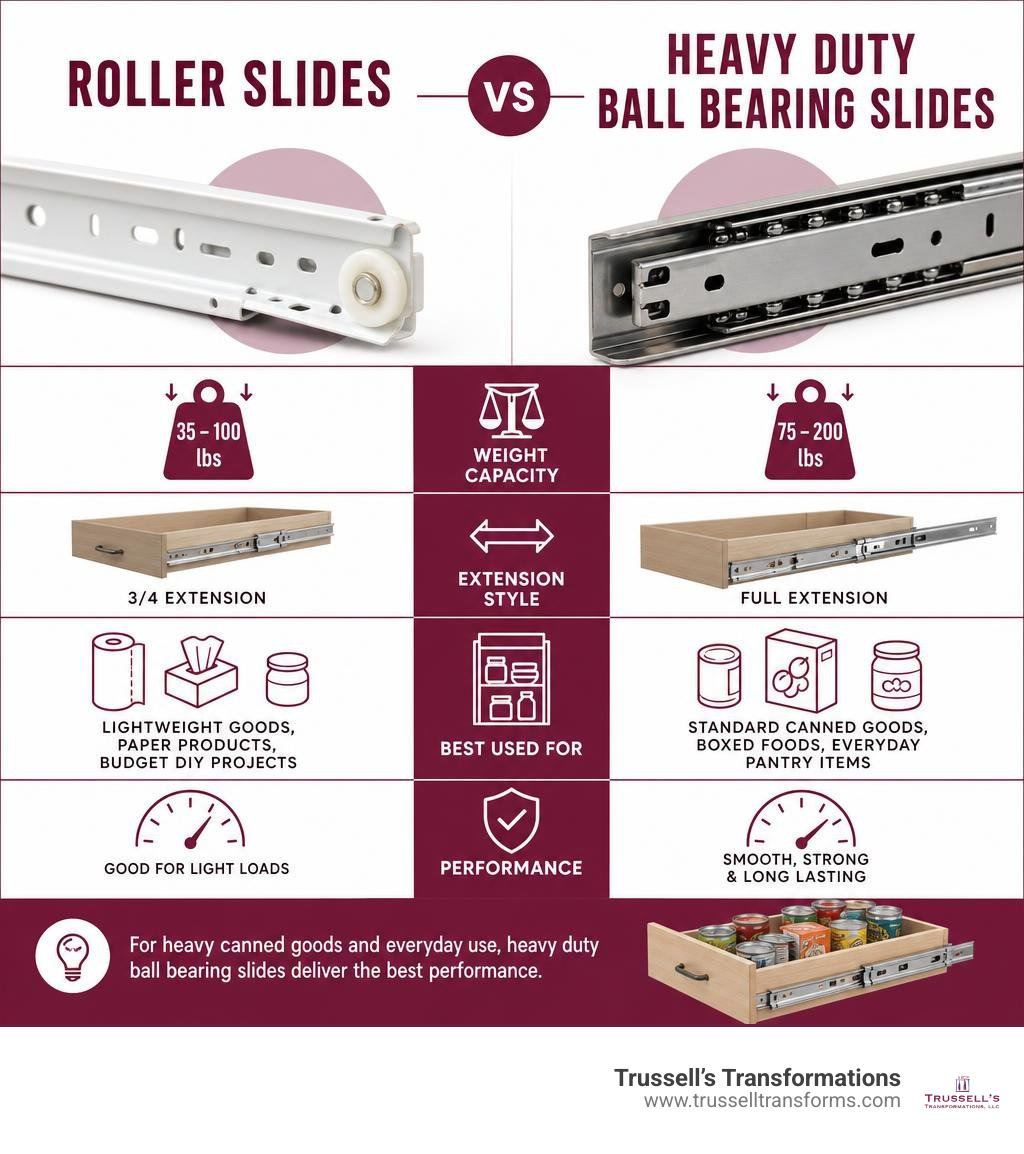
| Slide Type | Weight Capacity | Extension Style | Best Used For |
|---|---|---|---|
| Roller Slides | 35 – 100 lbs | 3/4 Extension | Lightweight goods, paper products, budget DIY projects |
| Ball-Bearing Slides | 75 – 100 lbs | Full Extension | Standard canned goods, boxed foods, everyday pantry items |
| Heavy-Duty Slides | Up to 200 lbs | Full Extension | Heavy bulk goods, small kitchen appliances, cast iron pots |
For deep pantries, full-extension ball-bearing slides are superior. They utilize steel ball bearings along continuous side tracks, providing smooth travel under heavy loads and extending the tray entirely outside the cabinet frame for total access. Soft-close slides add built-in dampers that pull the drawer shut quietly, preventing glass jars from clinking together.
Step-by-Step Guide: How to Install Pull Out Shelves in Pantry
Follow this practical, step-by-step approach to install your sliding trays securely. For additional hardware installation advice, review these practical 10 Tips for Installing Pull Out Pantry Shelves.
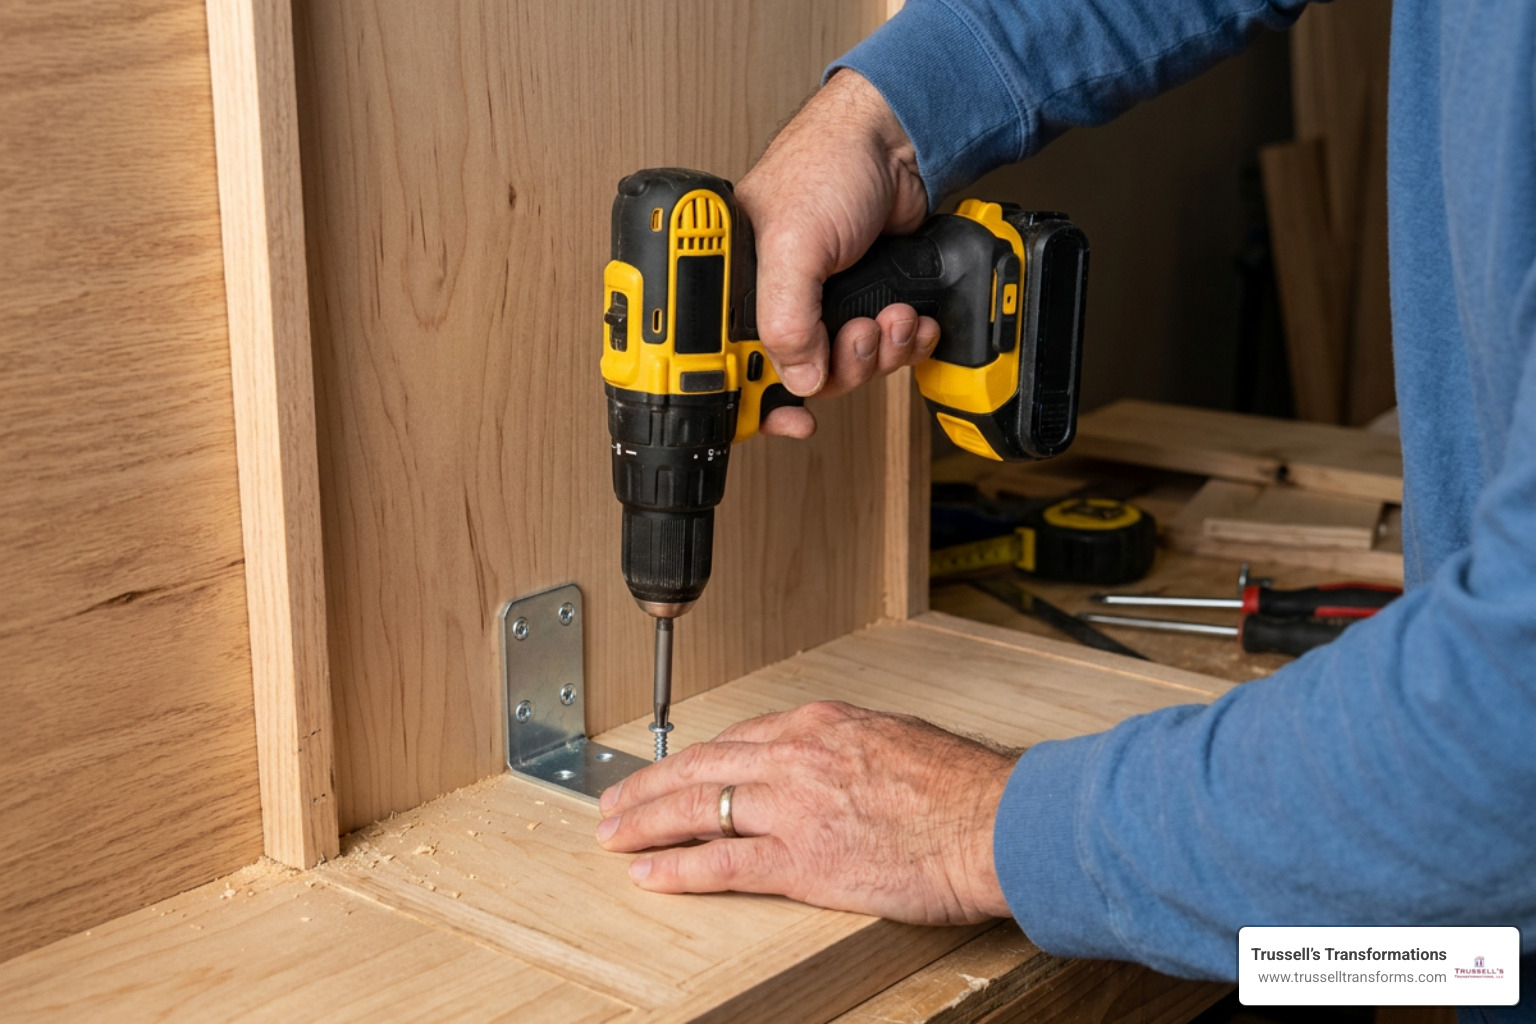
Essential Tools Needed to Install Pull Out Shelves in Pantry
Gather your tools before starting to make the process go smoothly:
- Cordless drill and driver bits
- Combination countersink pilot drill bits
- Torpedo level or small magnetic level
- Tape measure and pencil
- Cardboard or 1/8-inch Masonite shims
- Wood glue and pocket hole screws (if building drawers)
- Cabinet screws and wall anchors
Preparing Cabinet Walls and Securing Floating Shelves
Before mounting sliding trays onto existing adjustable shelves, you must stabilize the host shelf. When a loaded pull-out drawer extends outward, leverage shifts all the weight to the front, which can cause adjustable rear shelf pegs to pop out and flip the shelf forward.
To prevent tipping:
- Drive two or three cabinet screws into the back wall studs directly above the rear edge of the existing shelf board to act as hold-down stoppers.
- Alternatively, screw 1/4-inch wood support strips or metal L-brackets onto the side or back walls to clamp the shelf down firmly.
- Replace weak plastic shelf support pegs with heavy-duty metal support brackets.
Mounting Drawer Slides and Attaching Shelf Trays
For a visual breakdown of custom tray construction, read This Old House Guide to Pull-Out Shelves.
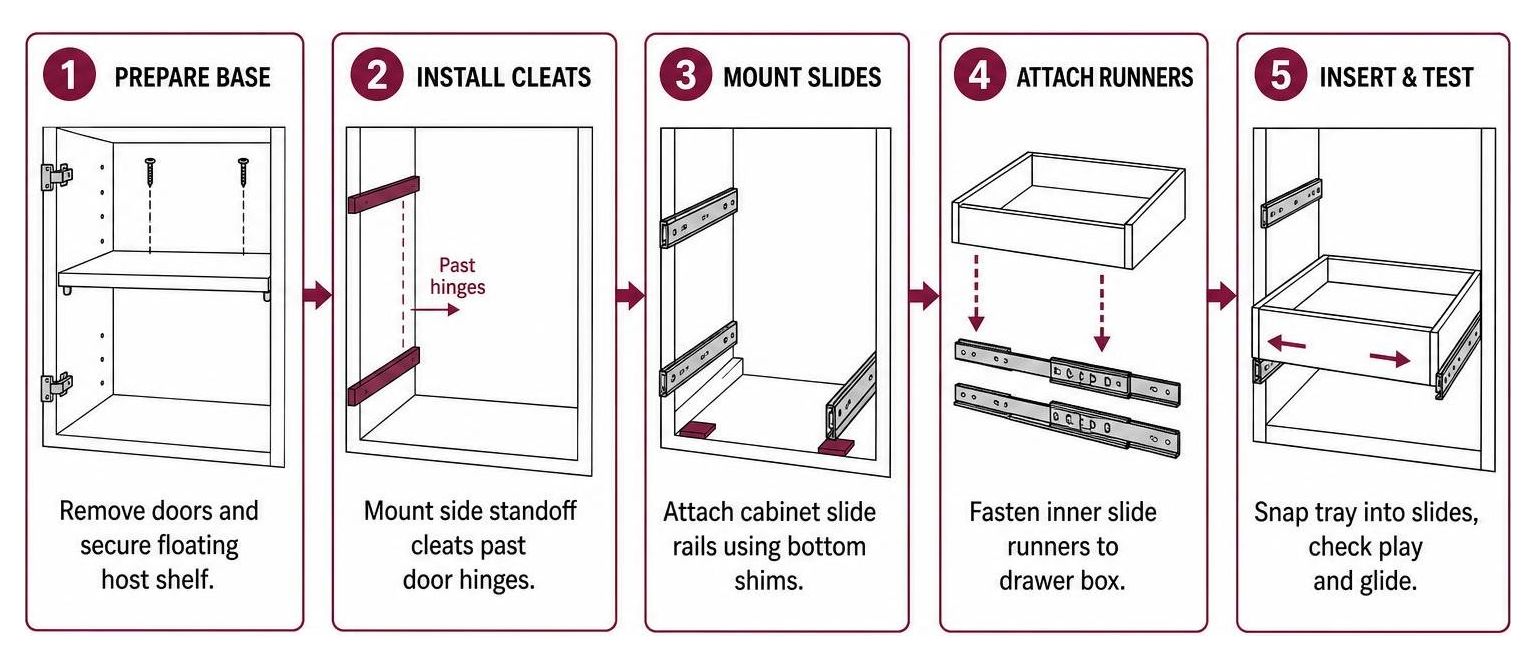
- Work Bottom-Up: Always start by installing the lowest shelf first so you have optimal lighting and room to maneuver inside the cabinet.
- Elevate with Shims: Place 1/8-inch cardboard or Masonite shims flat on the cabinet floor under your slide brackets. This tiny gap keeps the drawer box from scraping against the bottom face frame.
- Mount Cabinet Slides: Position slide rails approximately 1/4 inch back from the cabinet front frame. Secure the slide brackets using slotted mounting holes first, which allows for micro-adjustments.
- Attach Tray Runners: Separate the inner drawer member from the cabinet slide track by pushing the center release lever up or down. Mount these inner runners flush along the bottom edge of your custom shelf box.
- Insert and Adjust Play: Snap the drawer box into the cabinet tracks. Test the movement. Slides require roughly 1/16 to 1/8 inch of side-to-side play. If tracks bind, loosen the bracket screws slightly, shift alignment, and drive a final locking screw into the center mounting hole.
Overcoming Installation Obstacles and Customizing Storage
Real-world cabinets are rarely square, and hardware obstacles can complicate slide alignment.
Handling Door Hinges, Frameless Cabinets, and Unaligned Walls
Protruding door hinges are the most common obstruction when retrofitting shelves. If you mount a slide directly to a cabinet sidewall, the extended tray will crash into the hinge mechanism.
- Standoff Cleats: Rip 1×3 pine or plywood strips matching the length of your slide hardware. Screw these standoff cleats directly to the cabinet interior sidewall to fur out the drawer slide past the door hinge edge. Read our guide on proper cabinet installation for structural mounting insights.
- Frameless Cabinets: In frameless or Euro-style cabinets without face frames, use Euro spacers or horizontal mounting strips to build out side glides evenly.
- Base-Mount Brackets: If side walls are drastically unaligned or uneven, use base-mount L-brackets to attach the drawer slides directly to the cabinet floor or a secured horizontal shelf.
Customizing Heights, Depths, and Preventing Common Mistakes
Tailor your tray dimensions around the specific items you plan to store:
- Shallow Drawers (3-inch sides): Ideal for small spice jars, canned goods, and flat food packets.
- Medium Drawers (4 to 5-inch sides): Great for cereal boxes, pasta packages, and general groceries.
- Deep Drawers (6-inch+ sides): Best for tall items, oil bottles, or bags of flour that could tip over during quick glides.
Avoid constructing drawer boxes wider than 30 inches without support. Wide, single-span drawers loaded with heavy cans tend to rack and bind on side slides. If your pantry opening exceeds 30 inches wide, install an interior vertical divider panel to split the cavity into two independent, side-by-side rollout stacks.
Frequently Asked Questions About Pantry Pull-Out Shelves
How do I keep existing floating shelves from tipping forward when extended?
When a pull-out tray extends out of a cabinet, heavy leverage pulls forward on the host shelf. Prevent tipping by driving pan-head screws into the rear cabinet wall studs directly above the back edge of the host shelf board, leaving 1/4 inch of the screw head exposed to anchor the shelf board down.
What drawer slide weight rating is best for canned goods and heavy jars?
For pantries holding dense items like soup cans, tomato sauce jars, and bulk goods, choose full-extension ball-bearing slides rated for at least 100 pounds. Standard 35-pound roller slides can sag and bind under dense food weight.
How much gap clearance is needed between drawer slides and cabinet frames?
Drawer slide hardware typically requires 1/2 inch of clearance on each side of the drawer box (1 inch total subtracted from cabinet clear opening width). Maintain roughly 1/16 inch to 1/8 inch of alignment play across the tracks so slides run freely without jumping rails.
Upgrading Your Kitchen and Pantry Space
Adding pull-out shelving to your pantry transforms an everyday routine into a smooth, convenient experience. Bringing stored items directly to you eliminates awkward reaching and keeps food organized. Whether you construct custom Baltic birch trays or install pre-assembled roll-out kits, taking accurate measurements and selecting heavy-duty ball-bearing slides ensures your upgrade performs reliably for years.
When evaluating kitchen projects, visiting a dedicated design showroom allows you to test smooth glide hardware and inspect premium cabinetry options firsthand. If you are exploring a broader kitchen update, seeing high-end cabinet lines like Durasupreme Cabinetry, Waypoint Living Spaces, Sollid Cabinetry, and Kitchen Cabinet Distributors in person helps you compare build styles, dovetail joinery, and soft-close mechanisms.
Investing in a thorough, paid remodeling estimate provides essential design renderings, detailed site planning, and precise structural calculations—minimizing costly installation mistakes down the road. During full kitchen redesigns, pairing quality cabinetry with durable quartz or granite countertops offers substantial advantages over standard laminate surfaces, giving you superior scratch resistance, heat protection, and long-term home value.
If you hit tricky cabinet obstacles, unaligned walls, or want to explore complete custom storage configurations across Albuquerque, Rio Rancho, or Bernalillo County, our team at Trussell’s Transformations is ready to help. Explore our full range of professional options on our cabinet services page to start planning your ideal kitchen storage layout today.
Recent Comments