

Why Installing Pull-Out Cabinet Drawers Is One of the Best Upgrades You Can Make
Installing pull-out cabinet drawers is a straightforward weekend project that can completely transform how you use your kitchen storage. Here’s a quick overview of the process:
- Measure your cabinet’s interior width, depth, and height — accounting for hinges and obstacles
- Choose the right drawer slides for your cabinet type (face-frame or frameless)
- Mount the slides to the cabinet walls at an even, level height on both sides
- Attach the drawer box to the slides and test for smooth movement
- Adjust and secure all hardware once alignment is confirmed
Most homeowners can complete a basic installation in 3 to 4 hours, at a cost of $50 to $90 in materials — a fraction of what a contractor-installed or custom-ordered unit typically runs.
Think about the last time you got down on your hands and knees to dig through a dark base cabinet looking for a pot or pan buried in the back. It’s one of the most common frustrations in kitchen storage — and one of the easiest to fix.
Pull-out drawers bring everything stored in deep cabinets to your fingertips. A well-built shelf on full-extension slides can hold over 100 pounds, making it practical even for heavy cookware and small appliances.
Whether you’re a confident DIYer or considering a full kitchen upgrade with a licensed contractor, understanding the installation process helps you make smarter decisions — and avoid costly mistakes.
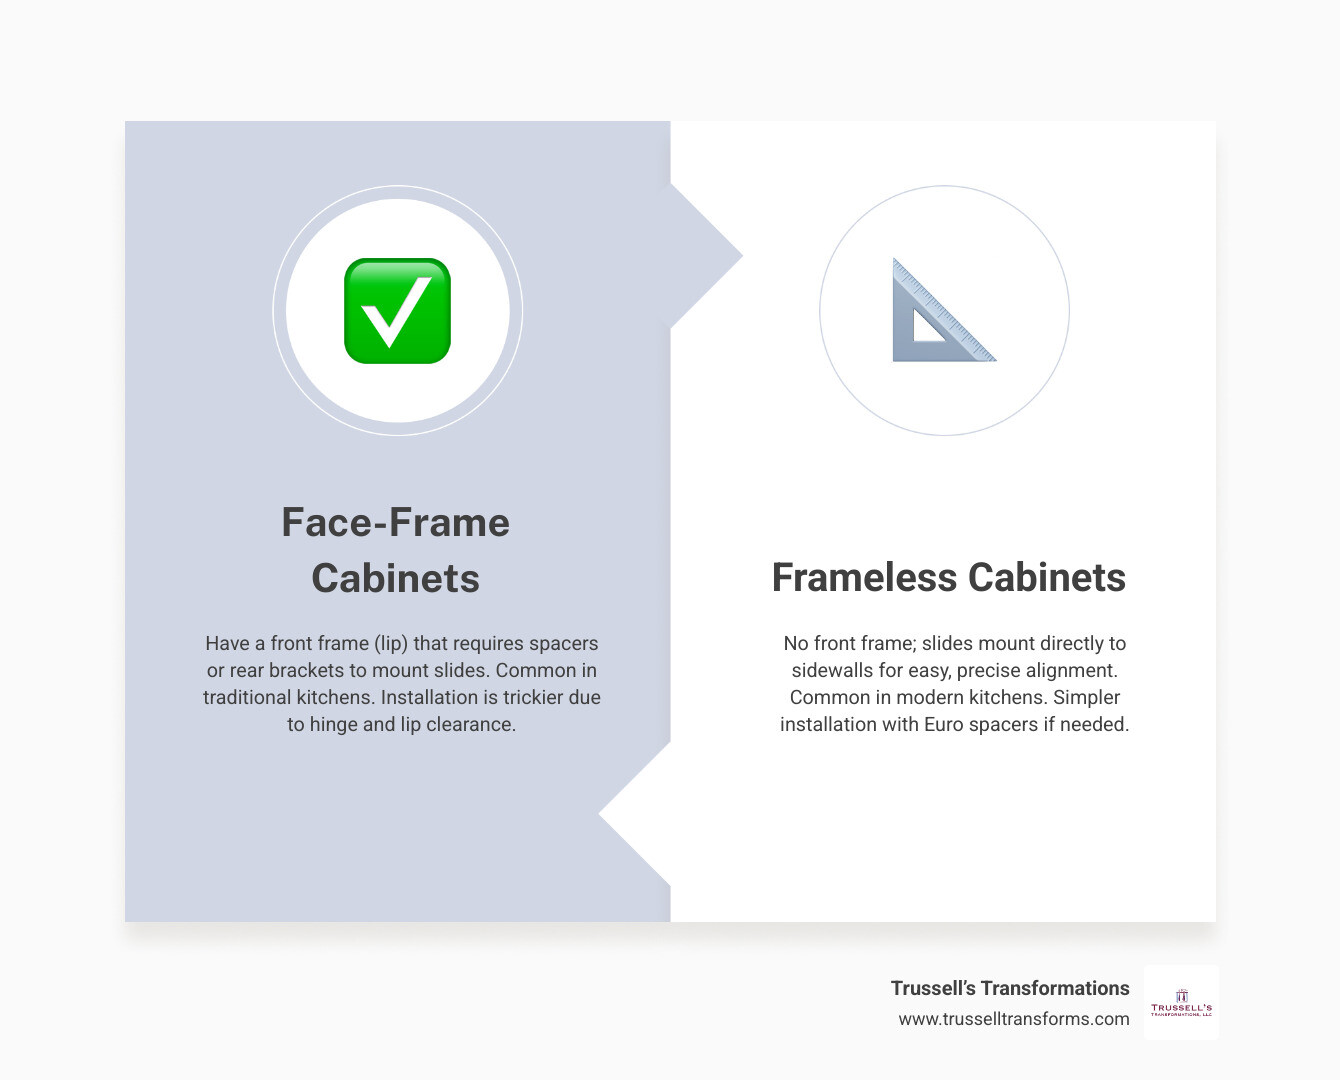
Installing pull out cabinet drawers terms simplified:
Planning Your Cabinet Upgrade: DIY vs. Professional Installation
When you decide to upgrade your kitchen or bathroom storage, you will inevitably face the classic dilemma: should you tackle this as a weekend DIY project, or is it time to bring in the professionals? While installing pull out cabinet drawers is rated as a beginner-to-intermediate DIY task, a broader kitchen transformation requires a highly coordinated plan.
At Trussell’s Transformations, we believe that any successful home renovation starts with meticulous planning. This is why we strongly emphasize the value of a paid remodeling estimate. A paid estimate is not just a quick price quote; it includes detailed 3D design renderings and precise spatial planning. Seeing a 3D rendering of your kitchen allows you to visualize exactly how your new drawers, cabinets, and countertops will interact. This upfront planning saves you thousands of dollars in the long run by minimizing layout mistakes, door clearance issues, and material waste.
If you decide to go the professional route, you can visit our showroom at 8023 Edith Blvd NE in Albuquerque, NM. Here, you can touch and feel the exceptional craftsmanship of our featured cabinet brands, including Durasupreme Cabinetry, Waypoint Living Spaces, Sollid Cabinetry, and Kitchen Cabinet Distributors. These manufacturers build outstanding semi-custom and custom cabinets designed to accommodate heavy-duty pull-out systems seamlessly.
While upgrading your cabinets, it is also the perfect time to think about your countertops. Replacing old laminate countertops with premium materials from Caesarstone, Cambria, Silestone, or The Stone Collection can instantly elevate your home’s value.
Why choose quartz or granite over laminate?
- Durability: Quartz and granite are incredibly tough, offering long-lasting performance and excellent resistance to heat and everyday wear.
- Aesthetics: Natural granite offers unique, one-of-a-kind patterns, while engineered quartz provides flawless consistency and modern elegance.
- Value: High-quality stone countertops are a major selling point for future buyers, whereas laminate is often viewed as a temporary budget option.
If you want to explore the balance between doing it yourself and hiring help, check out our DIY Cabinet Installation Guide to see what it takes to install larger cabinet units on your own.
Essential Tools and Materials for the Project
To ensure your installation goes smoothly without mid-project trips to the hardware store, gather your tools and materials beforehand. Having the right gear ensures a precise, level, and professional-grade installation.
Required Tools:
- Measuring Tape: A high-quality tape measure (at least 10 feet long) is essential for precision.
- Drill/Driver: An electric drill with a variety of drill bits and a #2 Phillips bit.
- Spirit Level: A small magnetic torpedo level is perfect for checking slide alignment.
- Pencil/Marker: For marking screw locations on the cabinet interior.
- Safety Glasses: Always protect your eyes when drilling into wood.
Required Materials:
- Plywood: If you are building your own drawer boxes, 3/4-inch birch plywood is the gold standard for strength and warp resistance.
- Drawer Slides: Choose slides that match your cabinet depth and weight requirements.
- Screws: 1-inch to 1-5/8-inch wood screws, depending on your cabinet wall thickness.
Selecting the right drawer slides is critical. Here is a quick comparison of the three most common slide types:
| Slide Type | Typical Weight Capacity | Mounting Position | Best For | Pros & Cons |
|---|---|---|---|---|
| Side-Mount | 75 to 100 lbs | Sides of drawer and cabinet wall | Heavy pots, pans, and pantry items | Very durable; visible on the sides of the drawer |
| Under-Mount | 50 to 75 lbs | Bottom of the drawer box | High-end custom cabinets, clean looks | Completely hidden; slightly lower weight capacity |
| Center-Mount | 35 to 50 lbs | Centered under the drawer | Light bathroom vanities, small drawers | Easy to install; limited weight support and extension |
For a deeper dive into choosing and mounting heavy-duty hardware, read our comprehensive Guide to Installing Kitchen Slides.
How to Measure Your Cabinets for a Perfect Fit
The old carpenter’s adage “measure twice, cut once” has never been more true than when installing pull out cabinet drawers. Even a 1/16-inch error can cause your drawer slides to bind, stick, or refuse to slide altogether.

To get a perfect fit, you must measure three key dimensions of your cabinet interior:
- Clear Opening Width: This is the narrowest point of your cabinet opening. Measure from the inside face of the door frame or the edge of the hinges (whichever sticks out furthest) to the opposite side.
- Cabinet Depth: Measure from the inside of the front face frame to the back wall of the cabinet. Standard kitchen cabinets are usually 24 inches deep, which typically accommodates a 22-inch drawer slide.
- Height Clearance: Measure the vertical height of the opening, keeping in mind any plumbing, electrical lines, or upper shelves that might block taller items like stockpots or blenders.
For a detailed walkthrough on translating these measurements into a product order, refer to the step-by-step guide on How to Order and Measure Pullout Shelving.
Measuring Your Space Before Installing Pull-Out Cabinet Drawers
When measuring, do not assume your cabinet is perfectly square. Over time, houses settle, and cabinet walls can bow or tilt.
Always measure the cabinet width at three distinct points: the front, the middle, and the back. Use the smallest of these three measurements when planning your drawer box width. If you build or buy a drawer based on the widest measurement, it will jam as you try to slide it past the narrower sections of the cabinet.
Additionally, pay close attention to hinge obstructions. Standard cabinet door hinges can protrude up to 1/2 inch into the cabinet opening when the door is fully open. If your drawer box is too wide, it will catch on the hinges. To prevent this, subtract the hinge protrusion (usually about 1/4 to 1/2 inch) from your total width measurement, or plan to use custom-thickness standoff cleats to push the drawer slides past the hinges.
Step-by-Step Guide to Installing Pull-Out Cabinet Drawers
Once you have your tools gathered and your drawer boxes and slides on hand, it is time to start the installation.

Here is the general sequence for a successful installation:
Step 1: Separate the Slides
Most full-extension ball-bearing slides come as a single unit. To install them, you must separate the drawer member (the thin part that attaches to the drawer box) from the cabinet member (the larger part that attaches to the cabinet wall). Locate the small plastic release lever inside the slide track, push it up or down, and pull the two halves apart.
Step 2: Mark Your Lines
Use your spirit level and tape measure to mark a level horizontal line on both interior cabinet walls. This line will act as your guide for mounting the cabinet slides. If these lines are not perfectly parallel and level, your drawer will slide open on its own or bind when pushed closed.
Step 3: Drill Pilot Holes
Hold the cabinet slide member up to your marked line. Use a centering punch or a pencil to mark the screw hole locations. Drill small pilot holes to ensure the screws drive in smoothly and securely.
For more professional tips on building and installing the drawers from scratch, check out How to Install a Pull-Out Kitchen Shelf.
Mounting Slides in Frameless Cabinets
Frameless (or European-style) cabinets are highly popular in modern kitchen designs. They lack a front face frame, meaning the interior cabinet walls are completely flush with the door opening. This makes side-mounting drawer slides incredibly simple.
To mount slides in a frameless cabinet:
- Mark a level line exactly 1 inch above the floor of the cabinet (or the desired installation height).
- Align the cabinet slide member with the line, setting it back approximately 1/2 inch from the front edge of the cabinet.
- Secure the slide directly to the cabinet sidewall using Euro screws or standard wood screws.
- If your drawer box is slightly too narrow for the opening, you can use specialized Euro spacers or cabinet member tabs to adjust the fit and bridge the gap.
Ensuring your cabinet structure is sound before mounting heavy hardware is crucial. Take a look at our Proper Cabinet Installation Tips to make sure your cabinet boxes are ready to handle the extra load.
Pro Tips for Installing Pull-Out Cabinet Drawers in Face-Frame Cabinets
Face-frame cabinets are the traditional standard in many American homes. They feature a solid wood frame attached to the front of the cabinet box. Because the frame extends past the interior sidewalls, you cannot mount drawer slides directly to the cabinet sides without some modification.
To overcome this obstacle, you have two primary options:
- Use Rear Mounting Brackets: The front of the drawer slide mounts directly to the face frame, while the rear of the slide is supported by a metal bracket attached to the cabinet’s back wall. To keep the slides perfectly parallel, calculate the rear bracket position by measuring the face-frame opening width and subtracting 3-1/8 inches. Keep the rear bracket screws slightly loose, slide the drawer box all the way in to self-align the tracks, and then tighten the screws.
- Install Standoff Cleats: You can rip custom-thickness wood spacers (or “cleats”) from plywood or scrap pine. Mount these cleats to the interior cabinet walls so they sit completely flush with the edge of the face frame. This creates a continuous flat surface, allowing you to mount your drawer slides just like you would in a frameless cabinet.
Common Mistakes to Avoid During Installation
While installing pull out cabinet drawers is a highly rewarding project, a few common mistakes can ruin your hard work:
- Relying Solely on Pin Nails: One of the biggest mistakes DIYers (and even some rushed contractors) make is using thin 23-gauge or 18-gauge pin nails to secure heavy-duty spacers or drawer backs. Pin nails have virtually no structural holding power on their own; they are meant to act as temporary clamps while wood glue cures. For long-term stability and to support heavy items, always use long, high-quality wood screws driven into solid wood studs or cabinet frames.
- Skipping Wood Glue: When assembling drawer boxes, always apply high-quality wood glue to the joints. Gluing and screwing your drawer panels ensures they can withstand years of daily pulling and pushing.
- Misaligning the Slides: If your slides are even slightly out of parallel, they will bind. Always use a level and a spacer template to ensure the left and right tracks are at the exact same height and distance apart from front to back.
- Skipping Pilot Holes: Always pre-drill pilot holes before driving screws to ensure a clean, professional finish and to keep your cabinetry looking beautiful and structurally sound.
If you want to build your own drawer boxes from scratch, read our guide on How to Build Pull-Out Drawers DIY to learn about proper joinery and assembly techniques.
Frequently Asked Questions About Cabinet Drawers
How much weight can a pull-out drawer support?
A high-quality pull-out drawer built with a 3/4-inch birch plywood bottom and solid wood frames can easily support over 100 pounds when paired with heavy-duty, full-extension ball-bearing slides. Standard side-mount slides typically support 75 to 100 pounds, which is more than enough for heavy kitchen mixers, crockpots, and stacks of plates.
How do you bypass cabinet hinges and face-frame lips?
To bypass hinges and face-frame lips, you can install custom-cut wood standoff cleats or plywood risers. If your cabinet floor sits lower than the front door sill (creating a blocking ledge), simply cut a piece of 3/4-inch plywood to fit the cabinet floor. This acts as a riser to bring the floor flush with the front lip, allowing the drawer to slide out smoothly.
Can I install pull-out drawers on existing shelves?
Yes! If you have a sturdy, full-depth existing shelf, you can mount pull-out drawers directly to it using “L” brackets. To prevent the existing shelf from tipping forward when the loaded drawer is fully extended, make sure to secure the back of the shelf to the cabinet walls using locking shelf clips or a screw head left sticking out 1/4 inch directly above the shelf.
Conclusion
Upgrading your kitchen with pull-out cabinet drawers is a game-changer for daily convenience, organization, and accessibility. While a single drawer is a great weekend DIY project, transforming your entire kitchen or bathroom requires professional expertise, high-end materials, and meticulous design planning.
At Trussell’s Transformations, we bring over 25 years of home remodeling experience to the Albuquerque, Rio Rancho, and Bernalillo County areas. As a licensed, bonded, and insured contractor, we are your one-stop shop for custom cabinetry, premium stone countertops, professional flooring, and complete home remodels. We offer 0% financing options to help bring your dream kitchen to life without stress.
Ready to say goodbye to dark, cluttered cabinets and hello to effortless storage? Contact us or visit our showroom to get started on your custom design. Explore our Trussell’s Transformations Cabinet Services to see how we can bring beauty, function, and value to your Albuquerque home!
Recent Comments