

Introduction: Preparing for Base Cabinet Installation
Successfully attaching base cabinets involves locating the floor’s highest spot, establishing a 34 ½-inch level datum line, shimming each cabinet carcass plumb and level, clamping adjacent face frames flush, and securing the mounting rails directly into wall studs with 2 ½-inch washer-head screws. Base cabinets stand 34 ½ inches tall so that once a standard 1 ½-inch countertop is added, the working surface rests at an ergonomic 36 inches. If your foundation boxes lean, rock, or sit out of square, every subsequent layer will amplify those errors.
Planning your layout requires mapping out structural studs, accounting for utility runs, and creating a continuous fastening strategy. Whether you are assembling factory-finished modular units or designing a built-in credenza, securing cabinets to walls and subfloors creates a permanent, solid installation that will last for decades.
Pre-Installation Site Survey and Floor Leveling
Before lifting a single cabinet into place, an extensive site survey is necessary. Residential floors are rarely flat; in older homes throughout Bernalillo County, floors can easily bow 3/8 inch over a 10-foot span. If you anchor your boxes directly against an unmapped floor, you will quickly find your face frames misaligned and your countertops dipping.
Begin by locating all wall studs using a reliable stud finder. Standard residential framing places studs 16 inches on center. Mark the center of each stud along the wall with pencil layout lines between 20 and 40 inches off the floor so your reference marks remain visible once the cabinet boxes sit against the drywall.
Finding the Floor High Spot and Snapping Datum Lines
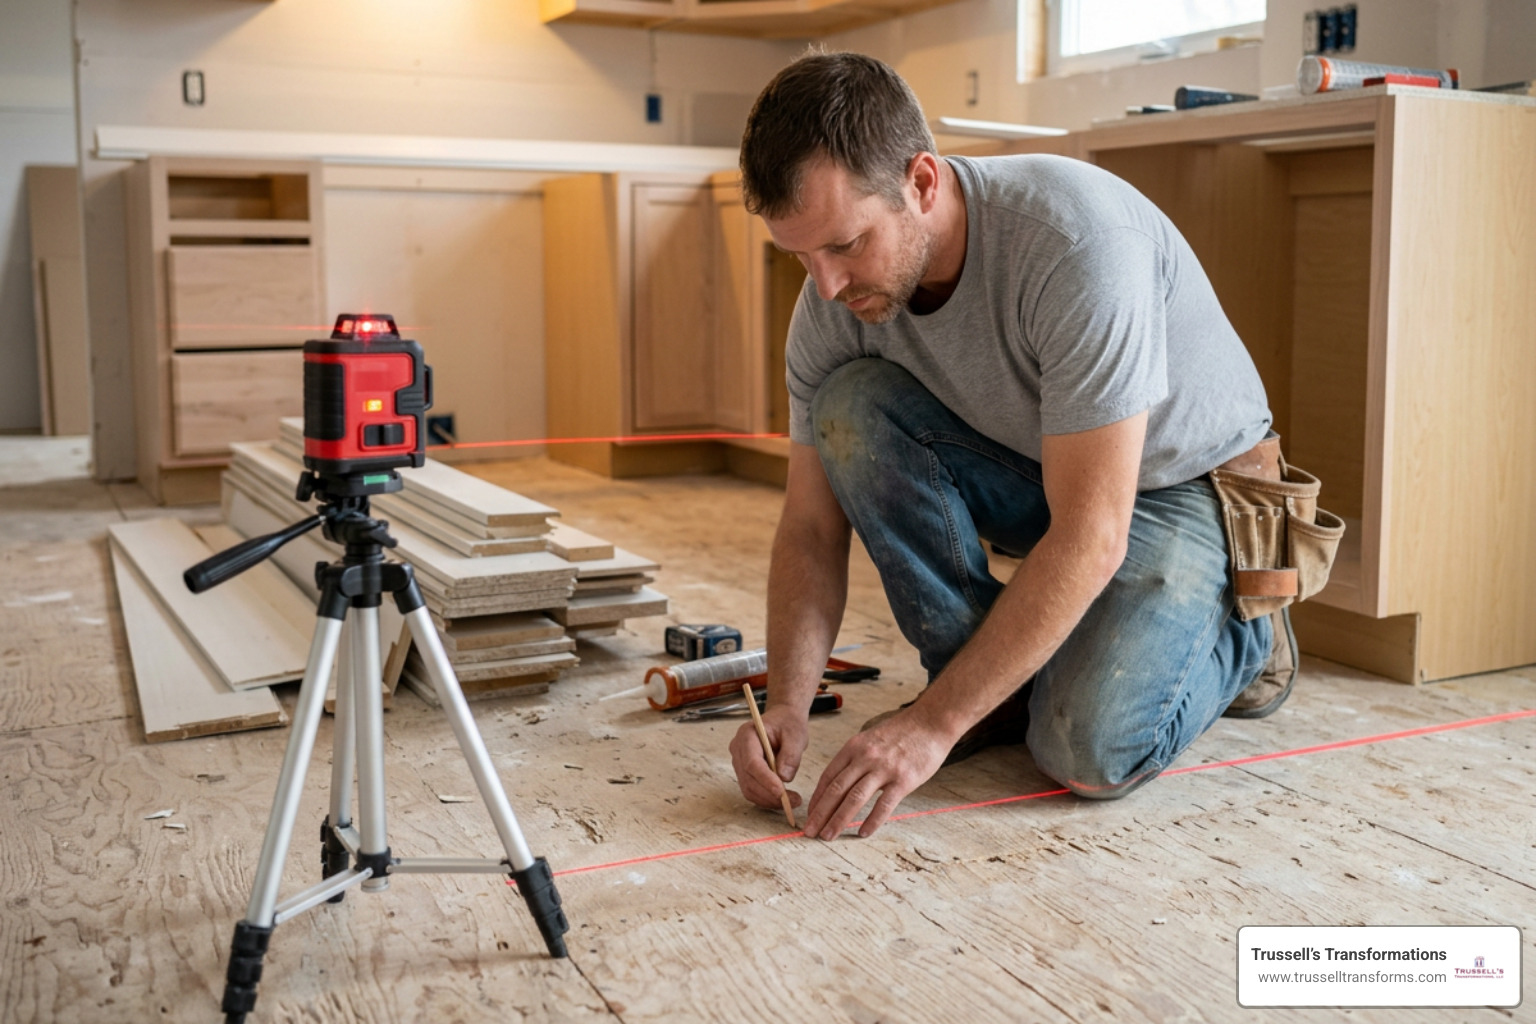
To establish a baseline, snap a level reference chalk line at 48 inches above the subfloor across all installation walls using a digital level or rotary laser level. Measure down from this 48-inch line to the floor at 12-inch increments across the entire perimeter of the planned run.
The shortest measurement represents the highest point of your floor. From this exact high spot, measure up 34 ½ inches (the height of standard base cabinets) and use your laser to project a continuous horizontal datum line across the room. This datum line marks where the top edge of every cabinet carcass must sit. By anchoring your baseline to the floor’s high point, you only need to shim adjacent cabinets upward rather than trimming down cabinet side panels. Mastering the best way to install cabinets like a pro always begins with this fundamental rule.
Managing Wood Moisture Content and Acclimation
Cabinet materials are hygroscopic, meaning they expand and contract in response to relative humidity. Hardwood face frames swell tangentially across growth rings up to 8% for species like oak and around 7.2% for hard maple, while longitudinal expansion remains under 1%. In fact, an unacclimated 24-inch base frame can shift up to 1/4 inch during seasonal transitions.
Target an interior moisture content (MC) between 6% and 8% before installation. Store your cabinets inside the climate-controlled installation space for 7 to 10 days to allow the lumber to equalize. Taking the time to acclimate high-quality materials from manufacturers like DuraSupreme Cabinetry, Waypoint Living Spaces, Sollid Cabinetry, and Kitchen Cabinet Distributors prevents joints from binding or popping after installation. This careful planning is a crucial part of choosing kitchen cabinets that won’t make you sad down the road.
Step-by-Step Guide to Attaching Base Cabinets
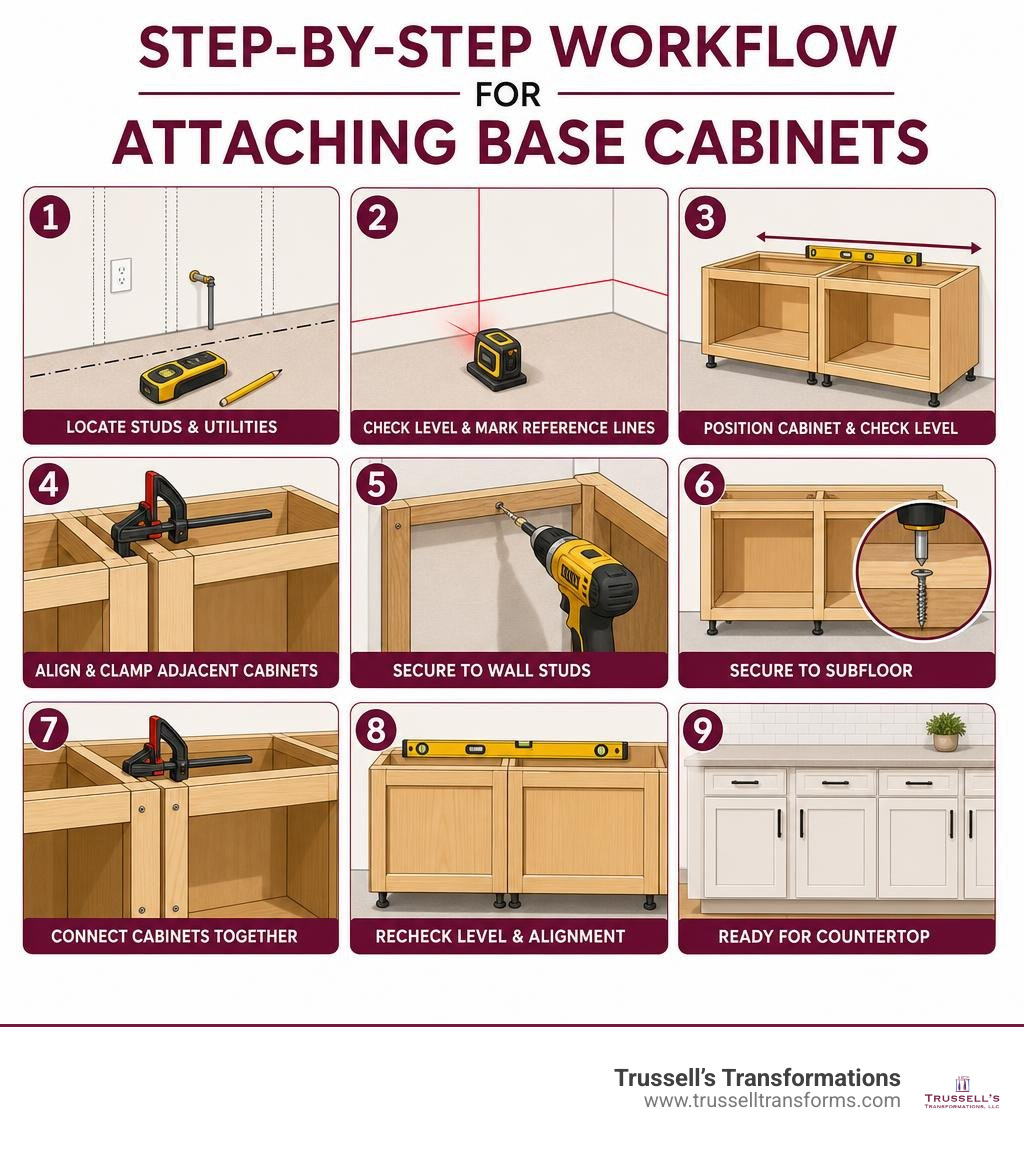
Attaching modular base units requires a methodical approach: dry-fitting the run, leveling each box, fastening into structural framing, and locking the face frames together into a rigid assembly.
Essential Tools and Fasteners for Attaching Base Cabinets
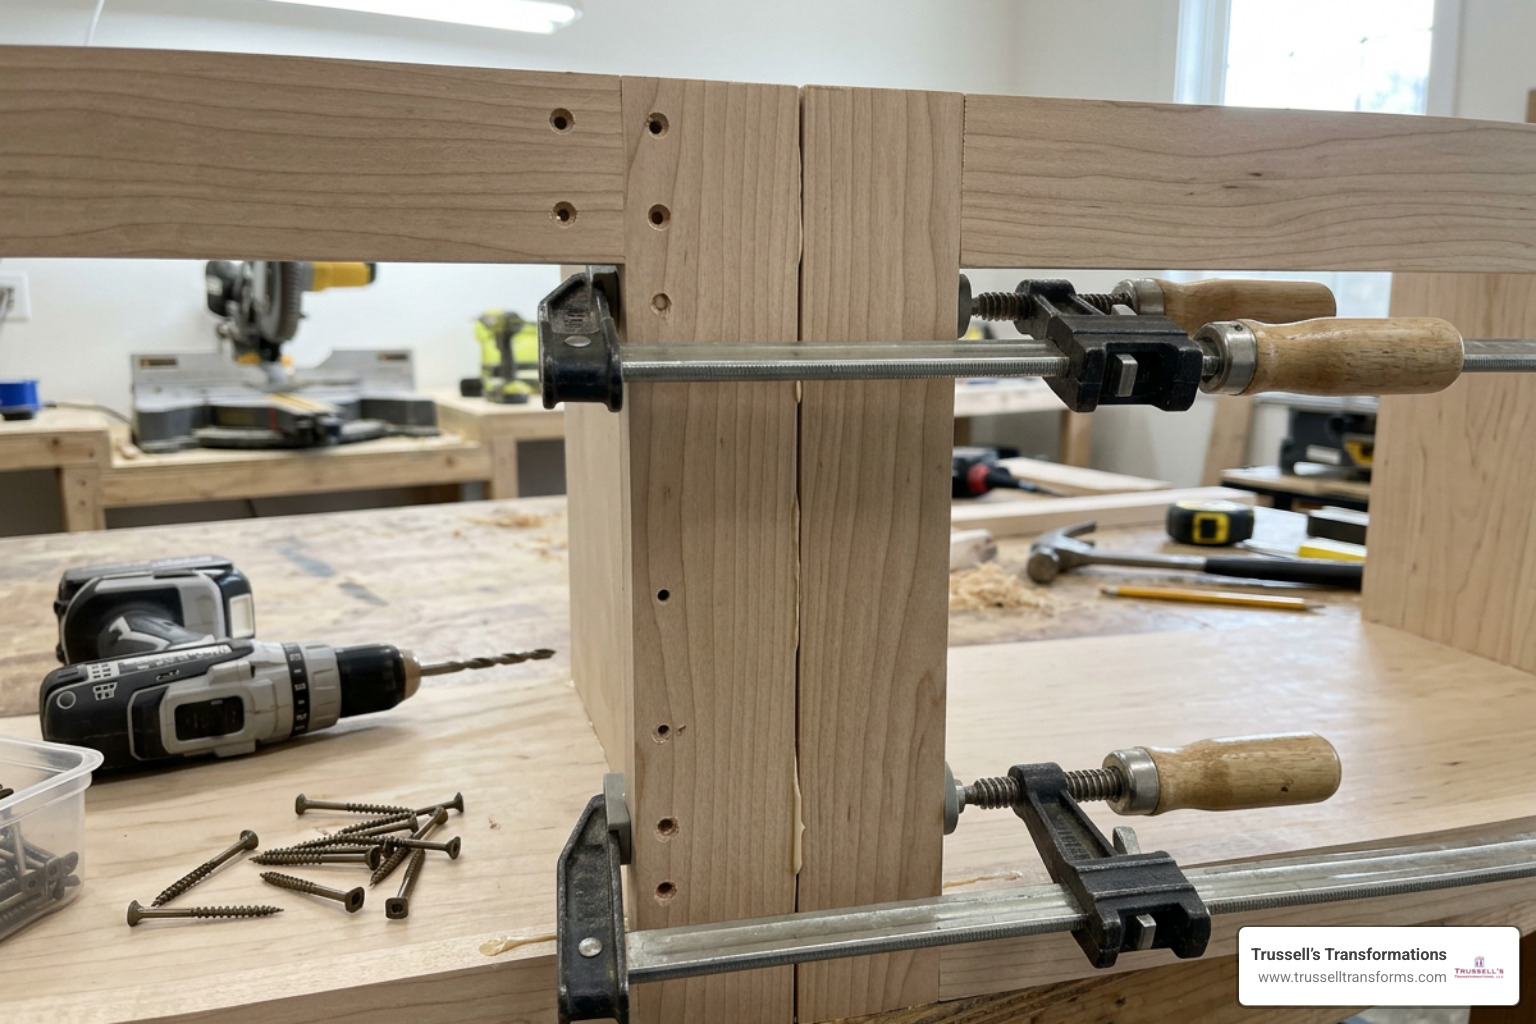
Never use standard drywall screws to secure cabinetry. Drywall screws are brittle, lack significant shear strength, and their bugle heads sink into wood rather than holding mounting rails firmly under heavy loads. Instead, use dedicated 2 ½-inch washer-head cabinet screws (such as star-drive GRK screws) for securing boxes through drywall into studs. For connecting adjacent face frames, use 1 ¼-inch to 1 ½-inch trim-head screws.
Review the structural properties of fasteners and joinery methods below to understand why proper mechanical connections are mandatory:
| Joinery / Fastener Type | Average Shear Strength | Best Application in Base Installation |
|---|---|---|
| Butt Joint (Glue Only) | ~500 psi | Temporary positioning only (insufficient alone) |
| Pocket Hole Screws | ~1,200 psi | Face frame joinery & carcass assembly |
| Loose Tenons / Dominos | ~2,500 psi | Heavy-duty face frame and plinth alignment |
| Glued Mortise & Tenon | 3,000–4,000 psi | Custom base structures & solid hardwood plinths |
| Titebond III Wood Glue | 4,500 psi | High-strength joint reinforcement & moisture areas |
| 2 ½-in Washer-Head Screws | Heavy Structural Rating | Anchoring mounting rails into wall framing |
For a deep dive on traditional master-carpenter methods, study how to install kitchen cabinets – This Old House to see how expert tradespeople join multiple boxes before anchoring them into studs.
Cutting Openings for Plumbing, Outlets, and Mechanicals
Before setting sink bases or vanity boxes against the wall, transfer all plumbing stub-out and electrical box locations to the cabinet back panels:
- Measure from the adjacent leveled cabinet edge or corner to the center of the pipe or electrical box.
- Measure upward from the floor reference line to the center of the utility.
- Transfer these coordinates onto the rear panel of the cabinet.
- Drill clean utility cutouts using spade bits or hole saws for supply lines and drain pipes, cutting holes approximately ½ inch larger than the pipe diameter to leave room for slight adjustments.
- Use an oscillating multi-tool to make rectangular plunge cuts for electrical outlets or data connections.
Shimming, Fastening to Studs, and Joining Face Frames
Remove all cabinet doors and drawers prior to hanging to reduce weight and make positioning easier.
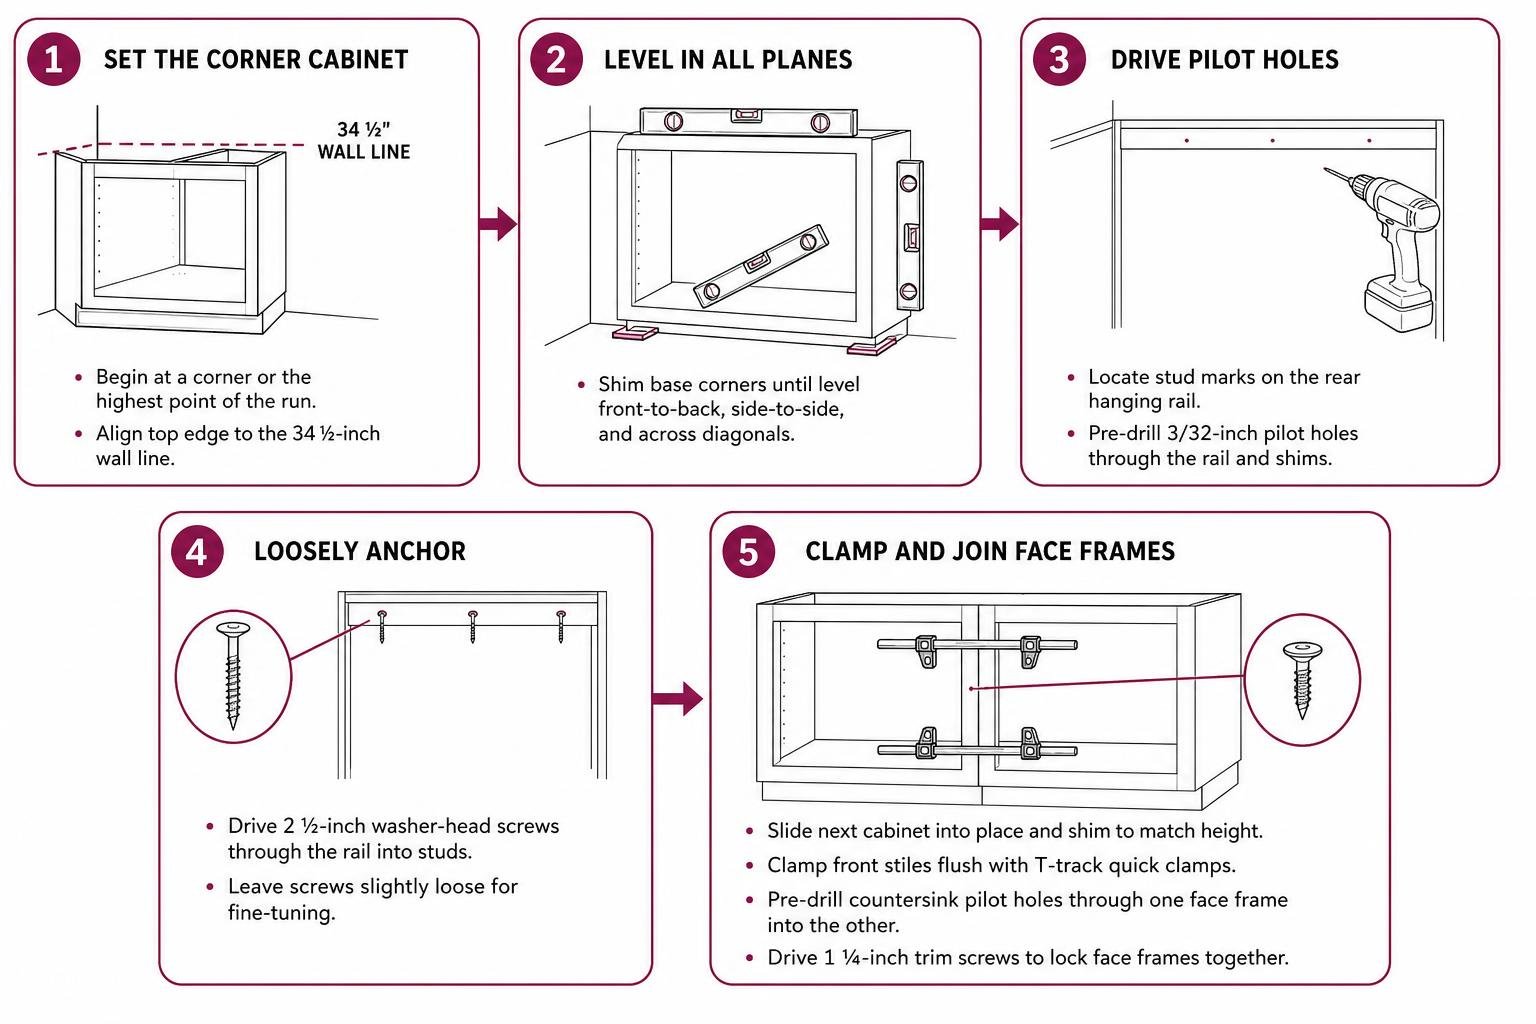
- Set the Corner Cabinet: Always begin at a corner or the highest point of the floor run. Position the first cabinet so its top edge aligns perfectly with your 34 ½-inch wall line.
- Level in All Planes: Slide composite or cedar shims underneath the cabinet base corners until the unit sits level front-to-back, side-to-side, and across diagonals.
- Drive Pilot Holes: Locate your stud layout marks on the rear hanging rail. Pre-drill pilot holes using a 3/32-inch bit through the hanging rail and shims.
- Loosely Anchor: Drive 2 ½-inch washer-head screws through the rail into the studs, leaving them slightly loose to allow fine-tuning as you place adjacent units.
- Clamp and Join Face Frames: Slide the next cabinet into place, shimming it to match the height of the first unit. Use two T-track quick clamps to pull the front stiles flush. Pre-drill countersink pilot holes through the side of one face frame into the other, then drive 1 ¼-inch trim screws to lock the face frames together.
- Tighten Wall Screws: Drive a minimum of two 2 ½-inch screws per stud through each cabinet mounting rail, then tighten the wall fasteners completely down the entire run.
Installing Filler Strips, Scribe Molding, and Toe Kicks
Walls are rarely straight, often bowing outward or leaning out of plumb. Where a cabinet meets a wall, use a filler strip to provide door clearance and create a tight fit against uneven drywall:
- Hold the filler strip against the wall, use a compass to scribe the wall’s contour onto the wood, and cut along the scribe line with a jigsaw or track saw beveled at a slight back-angle.
- Fasten internal mounting blocks behind the cabinet face frame, then secure the scribed filler strip to the blocks using finish screws or adhesive and brad nails.
- Once all units are fastened and checked for level, use an oscillating saw or utility knife to score and snap protruding shims flush with the toe kick cavity.
- Attach a continuous 3/4-inch toe kick backer followed by a pre-finished veneer skin using 18-gauge brad nails. After base installation and countertop placement, complete the look by learning how to install cabinet hardware correctly in 5 simple steps.
Securing Freestanding Islands, Peninsulas, and Built-In Bases
Freestanding islands and peninsulas lack structural walls to support their rear mounting rails. Without dedicated subfloor anchoring, the leverage applied by opening heavy drawers or leaning against stone countertops can slide or tip the island over time.
Anchoring Island Cabinets with Internal Subfloor Cleats
To create a rigid internal anchor for an island or peninsula base:
- Dry-fit the island cabinets in their final position, verify clearances (a minimum of 36 to 42 inches around walkways), and trace the perimeter of the cabinet bases directly onto the flooring with a pencil.
- Remove the cabinets and mark interior offset lines inside your tracing—typically ½ inch inward on the sides and 2 inches inward along the toe-kick faces, matching the hollow internal kick cavity.
- Cut two 2×4 framing boards to 17 inches in length.
- Align the 2×4 cleats inside your marked offset lines. Pre-drill pilot holes through the cleats into the subfloor.
- Secure each 2×4 cleat to the subfloor with three #8 x 2 ½-inch structural wood screws (six screws total).
- Reposition the island base units directly over the floor cleats.
- Measure 3 inches inward from each toe kick corner and ½ to ¾ inch up from the floor. Pre-drill with a 3/32-inch bit, then drive #8 x 1 ½-inch wood screws through the toe kick directly into the 2×4 floor cleats to secure the unit against shifting.
For specific dimensional diagrams, refer to the manufacturer’s peninsula island base installation standards to ensure your floor anchors clear internal plumbing and drawer slides.
Special Methods for Attaching Base Cabinets in DIY Built-Ins
For custom office credenzas, mudroom benches, or living room media built-ins, standard base cabinets provide deep storage and support:
- Baseboard Removal: Use an oscillating multi-tool to make clean vertical plunge cuts in your existing baseboards right at the cabinet footprint. Score the top caulk line with a utility knife to avoid tearing the drywall paper when prying the baseboard off the wall.
- Platform Plinths: If you prefer a seamless look without standard toe kick notches, build a level 2×4 ladder platform leveled directly onto the subfloor. Anchor the ladder base into wall plates and subfloors, then set flat-bottomed cabinet boxes directly on top.
- Dead Space Management: Distribute leftover space evenly on both sides of the run using wide filler panels anchored to hidden side blocks. If you are debating between custom joinery and stock modular boxes for your project, consult our guide on what is a cabinet maker and do you need one to weigh the benefits of custom cabinetry.
Frequently Asked Questions About Attaching Base Cabinets
What type of screws should be used when securing base cabinets to wall studs?
Always use #8 or #10 x 2 ½-inch low-profile, washer-head star-drive cabinet screws. The integrated washer distributes holding force across the cabinet mounting rail, preventing the head from pulling through the back panel. Never use brittle drywall screws or standard countersink wood screws without washers for load-bearing wall connections.
How do you compensate for a floor that slopes over a long cabinet run?
Start your installation at the highest point of the floor and draw a level horizontal reference line across the wall at 34 ½ inches. Set the first cabinet at this high point, then use tapered composite or hardwood shims beneath the corners of all subsequent cabinets to raise them flush with the reference line. Once secured, install a continuous toe kick cover skin across the bottom to hide any gaps created by shimming.
Should base cabinets be attached before or after installing upper wall cabinets?
In most kitchen layouts, installing upper wall cabinets before base cabinets is best practice. Mounting upper cabinets first allows installers to stand directly beneath the hanging line and position tall ladders without leaning over lower cabinetry, keeping the installation process open and unhindered. Review these 5 questions to ask before hiring cabinet installers to ensure your contractor follows proper installation sequences.
Achieve a Flawless Finish with Professional Installation
Properly attached base cabinets provide the flat, level foundation required for stone countertops. While laminate countertops have long served budget applications, solid surfaces like quartz and granite offer significant advantages. Granite brings unique natural veining and exceptional heat resistance, while engineered quartz provides a non-porous, highly durable surface that resists staining without requiring periodic sealing. Premium stone materials from trusted brands like Caesarstone, Cambria, Silestone, and The Stone Collection add lasting value and durability to any kitchen renovation.
Because quartz and granite slabs can weigh between 15 and 30 pounds per square foot, your base cabinets must be level across the entire run. Proper support across the base ensures that heavy stone tops sit completely flat and stable across every seam.
A successful kitchen renovation starts with thorough planning. Investing in a professional remodeling estimate delivers 3D design renderings, accurate floor plans, and detailed mechanical layouts. This planning phase ensures every cabinet, filler, and utility rough-in aligns accurately, eliminating costly installation mistakes and giving you peace of mind throughout the project.
At Trussell’s Transformations, we bring over 25 years of licensed remodeling experience to homeowners throughout Albuquerque, Rio Rancho, and Bernalillo County. Whether you are seeking premium cabinetry, master stone countertop installations, full kitchen remodels, or 0% financing options, visit our showroom at 8023 Edith Blvd NE, Albuquerque, NM 87113, or explore Trussell’s Transformations cabinet installation services to begin designing your dream home today.
Recent Comments